Showing posts with label knitting. Show all posts

Sunday, 28 October 2012

The Hooded Simon - a knitting pattern

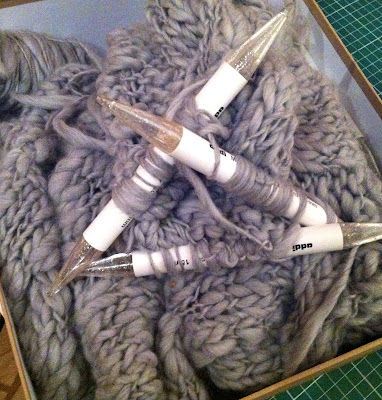
Will I be shot by the Sun-lovers if I admit that I'm in trans-seasonal bliss right now? The temperatures are erring towards freezing and the clocks have gone back eliminating another hour of sunlight; there are still heaps of crispy Autumn leaves everywhere fresh for the frolicking, and still a week to go before all the fireworks and mulled wine and toffee apples... It is getting seriously cold though. Perfect timing, then, to make a start on this year's snood, or Simon, as I will from now on be calling them, thanks to Kathryn of Yes I Like That. Made from Toft's chunky alpaca yarn and 10mm circular needles, this guy was knit in an evening and a half and has been warming my scalp ever since. Here's how:


You will need:
Gauge: 10 stitches / 14 rows = 4"


Cast on 60 stitches. Being careful not to twist your stitches, join to work in the round.
Knit 6 rounds of garter stitch (knit one round, purl one round, repeat).
Knit approx 22 rounds of stockinette stitch (just knit rounds), or until your snood is as deep as you want it to be around your neck.
Next round: knit 17, purl 26, knit 17. This sets up the width/depth of the hood. To adjust, increase or decrease the number of knit stitches either side or the purls - and obviously decreasing/increasing the number of purls accordingly to keep the number of stitches in the round consistent. This hood was designed to sit perfectly on the head as in the picture, therefore I would advise against making the hood shallower.
Next round: knit.
Repeat the last 2 rounds twice more.
Next round: knit 20, bind off 20 stitches, knit 20.

Working the hood:

Now, still on the circular needles, but now working in rows knitting the hood back and forth:
Row 1: purl 37, knit 3.
Row 2: knit 37, purl 3.
Continue in this manner, repeating rows 1 & 2 until your hood reaches your desired length (mine is quite long - it's to hold all my hair, of which I have a lot).
End on a knit row - as if you were just about to begin another row of purls.

Closing the hood:

The best way to close the hood (in my opinion) is with the kitchener stitch: holding the needles together (wrong sides of the work facing), cut the yarn leaving a nice long tail (about 4 times the length of what you'll be stitching o be safe). Thread on a yarn needle and following this great video tutorial, close the hood with the kitchener stitch.


You could, alternatively, cast off at this point and with right sides together stitch the top of the hood closed, or cast off both sides of live stitches with a 3 needle bind off. Man, wouldn't it be fun to make knitting technique video demonstrations? But in a really fun (& still instructional) way...?


With the advantage of hindsight, next time I make this I will avoid the silvery grey colour... Let's face it - I'm reminding you a bit of a knight in a chain maille hood, am I right?? A super cosy knight, mind you.

Saturday, 3 March 2012

Catching Up

Can it really be March already?  Almost a quarter into 2012 - already??  Wow.  Time certainly does fly when you're having fun // deliriously scheming new business schemes // working on a million projects at once.  In fact, I think I spent most of February trying not to spread myself too thin.  Looking back, or rather, flicking through the pages of my Filofax to recap, I can see that, despite not having much in the way of finished pieces to show for it, I actually did do a whole lot over the last four weeks: scheming sessions and meetings aplenty, kiddy parties and half term activities galore, three trips out of London... all with a constant undertone of knitting needles clicking and sewing machines whirring.

So, in the interest of taking myself a step back from everything I've got going on to take stock (fighting my way out of a sea of to-do lists and UFO's), I have compiled a(nother) list of what's going on...

...In my studio

  • Minoru Jacket.  Having made an excellent start at the beginning of Tasia's Sew-Along, I then slightly put it to one side for a couple of weeks whilst prioritising other projects with actual deadlines.  But I had a little studio springclean the other day (inspired by Joanne's sewing room transformation) and instantly felt myself overwhelmed with renewed inspiration and got stuck straight back in.  It's amazing what two evenings' work can achieve - all I have left to do is stitch the lining wrists, gather the waist and sew the hem!  And I couldn't be more thrilled with how it's turning out.  I'm using a post-box red cotton twill, a supersoft brushed cotton tartan for the main lining and a slippery silver poly to line the sleeves.  I've omitted the hood but added side-seam pockets.
  • Surf Skirt.  When I saw this fabric on a recent trip to Goldhawk Road (important: join the petition to save the legendary Goldhawk Road fabric shops from demolition here!), I immediately imagined making an entire new Summer wardrobe using this cotton.  I guess it's probably a little silly to spend an entire season in surf print... So I'll start with a pleated miniskirt, which I thought I may as well put together as a tutorial... Watch this space.  And get down to Classic Textiles on Goldhawk Road to get in on the surf skirt action!
  • Still working on the Quilt, and a real life Wedding Dress for a friend (which, for obvious reasons, I won't be able to post any progress pictures of until after the wedding!).

...On my needles

  • Pickles' Close Cables Sweater.  Man, this has been on the go since October!  Which is insane - the yarn is so chunky and the needles so humungous it should have been doable in a week.  But it's proving a bit of a nightmare to handle - the needles are too huge and the yarn too irregular.  I've spent the last couple of years pretty much exclusively knitting chunky... But after this I don't think I'll want to see anything a needle fatter than 8mm for a while!
  • The Wonderful Wallaby.  This cult classic of a knitting pattern has been a regular feature on my to-make lists for months, and now that I'm free of the chunky yarn spell, I have finally cast on for the Willie Wallaby (size 4 - which already looks like it'll be too small for my three-and-a-half year old!) using a khaki green wool/alpaca blend and what feels like a very spindly 4mm circular needle!
  • The beginnings of a cropped jumper I'm making up as I go along.  In my mind, this will be the perfect top to my Surf Skirt...

...In my kitchen

  • I have barely been able to contain my excitement as Spring has truly sprung in the last week!  So it seemed only fitting to bake a little welcome offering in the form of this Rosewater Angel's Food Cake (recipe same as my Lavender Angel's Food Cake, just substituting the lavender water for rosewater).  
  • Sticky toffee pudding... Promising myself this will be the last caramel sodden cake I bake until Winter comes around again.  Damn, was this a good one.
  • Yet another batch of my infamous dairy-free chocolate cupcakes for a kiddy party.  I don't think I should keep this recipe to myself much longer... something this good needs to be shared!  Recipe coming soon - in the meantime, be sure to stock up on coconut milk and ground almonds...


Sigh... weight lifted, mind de-cluttered and consolidated.  Onwards and upwards.

Monday, 13 February 2012

Batman & Catwoman


My latest knits could not have been more perfectly timed.  As I sat knitting by a roaring fire, sipping a glass of 1934 Armagnac, eating Narnia-worthy turkish delight and merrily discussing Quantum Mechanics, this year's first snowflakes began to fall.


By morning, the snow had settled, the ponds were frozen and my little caped crusader and I each had a new masked Superhero Hat.


The design was inspired by this Catwoman Hat I had recently seen on Pinterest, and with its ingeniously simple construction, it was a dream to knit.  A fast and seamless knit on circular needles, and using less than a skein of Rowan's Big Wool for each hat, I know this will be something I will make over and over again. In fact, if you know me, let me know if you don't want one of these for your next birthday!


Tuesday, 10 January 2012

Christmas Makes, A Retrospective

Despite having had highly creative intentions for January 2012, it seems all I have actually accomplished so far is getting the car serviced (and other boring, but very grown up household stuff) and repeatedly writing list after list of Things To Do, Things To Make, Things To Find, Trips To Plan, and the lists go on...  I do love me a good list writing session.

But these days list writing is the only action my hands have seen since the last minute speed-knitting and power-cookathon that was Christmas Eve.  But I'm ok with that.  I've been savouring these last days of the Christmas Holidays, doing some light home reorganisation, falling even deeper in love with my sweet little boy (as if I didn't love him enough already!) and bonding with our new little Whippet pup, Mr. WhippoorWill.  Trying, and succeeding for now, to take the pressure off and really slow things down and keep myself firmly rooted in the now.  You know, Mindfulness and such.  Noticing, appreciating and absorbing, not only in relation to my son - who even at the age of 3 is growing up way too fast - but everything else from enjoying these calm and cosy white skied days, to remembering to acknowledge myself and being grateful for (and doing my best to maintain) my own health and youth, and spending as much time as I can with my family and friends whom I love so very much.  Especially two of my favourite girls who will soon be a lot less available to me as this month will see my incredibly talented sister move to Venice for 6 months to teach Art at our Grandmother's school, La Scuola Internazionale Di Grafica, and my best friend start a very fabulous but very full-time job.

So anyway, coming back from the tangent... I had just wanted to gather and share some of the things I made as Christmas presents, which for obvious reasons I couldn't document before they were given.  Some of these things came out so well that I'd definitely like to do a couple of remakes for myself and share some patterns with y'all.  Marie, are you ready to give DPN's a go?  Surprisingly easy and very profesh-looking!


This Elfin pompom hat and snood set was probably my favourite present I made.  The hat is based on a hat of my Mum's that she's been asking me to copy for ages - she got one too in red - and the snood is largely inspired by the flawlessly simple design made so famous by Karen, only with a series of yo, k2tog buttonholes through which I inserted a crochet chain drawstring with pompoms hanging off the ends.  Not for shy or retiring types, this set is pretty whimsical, possibly even comical, but unbelievably cosy knit up in Rowan's Big Wool.  The only reason I was even able to hand this over to my sister was thanks to the burnt orange colour choice - very her, not so me.


Another success using Rowan's Big Wool: a sort of decorative cabled neckwarmer held in place by a kilt pin, made for my Paternal Grandmother.


This Christmas Hamper was made for my last contribution to the Oxfam Fashion Blog, using a thrifted suitcase, but this never actually made it under the tree...


Supersoft cabled wristwarmers as seen above on my gorgeous little cousin.  My stepmum and brother also got wristwarmers similar to these.


The grown ups got little bottles of my homemade Limoncello which went down very well.  


These chunky red socks I made for my best friend, which although you can't see completely in the picture, have an intarsia heart on the heel, inspired by this free pattern.

My littlest sister got a skirt very similar to this one made using a paisley rayon and 2 layers of cherry coloured netting and there were a few hot water bottles given based on this tutorial, also put together for Oxfam.

So that's pretty much it (a few gifts still have to be made... The Colette Negroni for my stepdad and a silk dressing gown to be made from a 70s pattern for my Dad) - this retrospective has mainly just been for my own reflection and documentation but also to officially move on from 2011, saying a big Thank You not only to my family for the BEST Christmas and New Year EVER, but to everyone who has taken the time to read, comment, and generally support and encourage me on this blog.  I certainly wasn't prepared for the amazing journey it would take me on, and the wealth of inspirational bloggers I have discovered as a result.  I could gush some more about the creative/parenting blogging community, but I think anyone who writes a blog will know what I want to say, so instead: onwards and upwards to 2012!

Tuesday, 8 November 2011

Productivity

It's amazing what can be achieved when presented with an unexpected evening alone.  Not knowing when I might next have a chunk of uninterrupted studio time, I put Christmas present making aside and indulged in some selfish stitching... Skirts and snoods are usually my go-to projects if I want a quick fix - both quick and satisfying to make, not too fiddly, and always a welcome addition to my expanding wardrobe.


I started with a curtain that used to be in my Grandparents' house, but since losing its partner found its way into my stash.  A beautifully heavy floral cotton, too heavy for pleats or ruching, not enough fabric for a full circle skirt, but just enough for a 1/2 circle - something that's been on my to-make list for a while.  Drafting it was quick and easy, I didn't even bother making a paper pattern, which actually I'm slightly regretting now as it came out so perfectly that I'm on the brink of making a whole family of 1/2 circle skirts.  I only had enough fabric for a slightly awkward above-the-knee length, which I embraced by sewing an amazing vintage trim my Mum gave me years ago that's been waiting for the perfect opportunity to be used, to add a few extra inches to the hem.


After the success of my skirt - and I really think this one is up there with my favourite skirts ever made - I settled in for the night and cast on for a chunky ribbed snood, which I had every intention of saving in my Christmas Present Bag...


But hell no, my friends, like so many other things I make intended for others, I am so keeping this one!  I can always knit more...


An evening well spent I say.

Thursday, 27 October 2011

Misty Monday Morning Kit ~ mittens & cowl knitting pattern


~ Making your way to work when it's barely even light ~ Bundling into a frozen car, still in pjs, on the school run ~  Dragging yourself + kids + dogs to the park on a miserably drizzly morning ~

Ok, so it's not yet that cold here yet... But it's definitely getting there.  This winter kit knits up so fast that you won't even have time to feel the cold.  And using only 4 50g balls of Debbie Bliss Como (now discontinued so get it for around £3 a ball on eBay), we're talking unspeakable luxury for little more than £12.  I'll be keeping this set myself, but will definitely be making up a few more as Christmas gifts...


Mittens (make 2)

Size: Adult
Gauge: 10 stitches = 10cm/4"

2 x 50g balls Debbie Bliss Como, main colour (leftovers to be kept for neck-warmer)
1 x 50g ball Debbie Bliss Como, contrast colour
8mm DPNs
10mm DPNs
2 stitch markers
crochet hook (5-7mm)
yarn needle to sew in tails

Abbreviations
DPN - double pointed needle
MC - main colour
CC - contrast colour
CO - cast on
BO - bind off
st(s) - stitch(es)
k - knit
p - purl
rnd(s) - round(s)
rep - repeat
cont - continue
k2tog - knit 2 stitches together
SM - stitch marker
dec - decrease

Cuff & Thumb Gusset

Using 8mm DPNs and your CC, CO 20 sts, arrange over 3 needles (7 sts on 2 of the needles and 6 on the 3rd) and join to work in the round being careful not to twist your sts.
Work 6 rnd of k2 p2 ribbing.
next rnd: switch to MC and work a further 4 rnds of k2 p2 ribbing (10 rnds ribbed cuff).
rnd 11: switch to 10mm DPNs and knit, placing a SM in between the penultimate and last sts.
rnd 12: k1, place SM, knit to 1st SM  ~This is the set up for the thumb gusset.  If this is your first time knitting mittens, this might all sound a little scary.  It's really not - watch this tutorial before continuing to get a visual of the process~ m1 after 1st SM and again before 2nd SM.
next rnd: knit.
You will be increasing sts like this just inside of each SM to create the thumb gusset every other rnd, knitting the alternating rnds.  Cont until gusset has 10 sts.  Slip these 10 sts onto a piece of scrap yarn.

Main Body

CO 2 sts using the thumb technique onto the last needle in the rnd and join mitten, continuing with the 20 sts originally cast on.
Knit 13 rnds (or more depending on length of fingers - but you need to leave a generous inch to decrease), then dec like this:
*k2, k2tog* rep for rest of rnd.
next rnd: knit.
next rnd: *k1, k2tog* rep for rest of rnd.
next rnd: knit.
Cont until you have 10 sts remaining. Close the mitten using the Kitchener Stitch.

Thumb

Pick up 14 sts - the 10 held by the scrap yarn and 4 more to close the gap. Knit one rnd, and on the 2nd rnd, dec 4 sts by k2tog evenly spaced along the inside of the thumb - decreased sts on the outside will be visibly and make the thumb look a little odd.
Knit 4 rnds (or more depending on thumb length).
next rnd: k2tog to end.
next rnd: knit.
Cut yarn and thread onto a yarn needle.  Slip off rem 5 sts onto needle (purlwise) and pull tight. 
Weave in all loose ends.

Make a crochet loop to attach to cuff to hang mittens (optional, but if you do - chain 20).


Neck-Warmer

less than 1 50g ball Debbie Bliss Como, main colour leftover from mittens
just under 2 50g ball Debbi Bliss Como, contrast colour leftover from mittens cuff
8mm DPNs
10mm circular needle (or DPNs)
yarn needle to sew in tails

Using 8mm DPNs and MC, CO 60 sts, arrange over 3 needles (20 on each) and join to work in the round being careful not to twist your sts.
Work 5 rnds of k2 p2 ribbing. 
rnd 6: switch to CC and cont in k2 p2 rib for a further 2 rnds.
rnd 9: switch to 10mm needles and knit in stockinette st until you've almost used up your CC yarn - leaving enough to switch back to your 8mm DPNs for 2 rnds of k2 p2 ribbing.  Switch back to your MC yarn and work 5 rnds k2 p2 rib, and cast off.
Weave in loose ends.  Done!


Keep this kit by your front door and forget numb fingertips and chills down your spine (the cold ones at least!).

Friday, 21 October 2011

WIPs

With Christmas little more than 9 weeks away, I'm already starting to feel the pressure...  And in order to keep on top of my personal projects//private commissions//present making, I seem to be making a start on everything all at once, to be worked on bit by bit on rotation, surrounding myself with the beginnings of everything I need to have done by Christmas, just so my work load can make sense to me visually.  

Herewith a little handful of my Works In Progress...


Practising piecing hexagons for a very special project that I'm keeping quiet for the time being...


Notes on a hat I've been promising my Mum since last Christmas.


The most deliciously soft beginnings of Pickles' Close Cables Sweater (for me!).


Inside view of my Swing Jacket.  Let's face it, we're talking extreme procrastination here.  All that's left to do is hand stitch the lining and sew on the buttons.  An evening's work.  I would argue that my lack of a mannequin in my life is making accurate pinning of the lining harder than it needs to be, but today my lovely neighbour Jess lent me hers.  And she needs it back soon, so no more excuses!


Some I-cord piping for a Christmassy tutorial coming soon...


And lastly, my floor this evening: hot cocoa and a chunky mitten - because my hands were freezing today, and then I thought it would be nice to prepare a quick winter warmer kit pattern (coming soon too).

~

Tip of the iceberg...

Saturday, 15 October 2011

Preparing for Autumn ~ part VI

It's always a strangely bittersweet mix of emotions coming to the end of a project.  As I go ticking off the things on my Preparing for Autumn list I compiled back in July, I find myself feeling satisfied and efficient (and warm!) but also slightly sad to have to put it behind me, having enjoyed the process so much.


But really it's ok - I get to enjoy the fruits of my labour and you can be sure I have an ample supply of to-do lists in the waiting.  And that is why I can't stop crafting: my life is creative and productive, never boring, always learning and improving, a world of infinite possibilities...


My Big Herringbone Cowl, finished just in time as the temperature dropped.  I am completely in love with this stitch - so elegant and subtly interesting, unlike most knits I've seen, without an obvious knit or purl in sight.  To see the journey I've taken in the making of this snood - which began life as an old Maxmara cardi - see here.

Monday, 10 October 2011

Fighting Crowds of Grannies...

...stocking up on supplies and overdosing on inspiration, this weekend at London's Knitting & Stitching Show at Alexandra Palace.

Quilting cottons at The Eternal Maker

Romantic chevrons at Colinette


Knit-kits at Handscape Knits

Chunky, rusty ribs at Sublime

Liberty quilting bundles at Sunflower Fabrics

Sunday, 25 September 2011

Sleepy Polar Bear Hat - knitting pattern

There's nothing quite like a cute, cosy hat for your kid that knits up super fast to make you feel like the queen of domestic productivity.  So good, it had to be shared.


~ Sleepy Polar Bear Hat ~

Materials
2 x 100g skein of bulky-super bulky weight yarn (I used some delicious local natural yarn I found in my favourite craft shop which was unlabelled)
scrap of brown yarn, to embroider the bear's eyes and nose
set of 5 7mm DPNs
3 stitch markers or scrap yarn
yarn needle

Gauge: 1" = 3 stitches / 4.5 rows
Size: Child, fits ages 2 - 4

Abbreviations
k - knit
p - purl
st st - stockinette stitch
k2tog - knit 2 stitches together
st(s) - stitch(es)
rnd - round
cont - continue
rep - repeat
SM - stitch marker
CO - cast on
BO - bind off


Starting with the ear flaps ~

CO 4 sts.  Knit 1st row.  Turn.
row 2: k1, m1, k2, m1, k1 (6 sts).
row 3: knit.
row 4: k1, m1, k4, m1, k1 (8 sts).
row 5: knit.
row 6: k4, m1, k4 (9 sts).
row 7: k4, p1, k4.
row 8: k4, m1, k1, m1, k4 (11 sts).
row 9: k4, p3, k4.
row 10: k4, m1, k3, m1, k4 (13 sts).
row 11: k4, p5, k4.
row 12: knit.
row 13: k4, p5, k4.
Rep rows 12 & 13 3 times altogether.  Cut yarn, keeping sts on the needle.  Make another ear flap in the same way.

Hat ~

CO 7 sts.  Turn the needle so the working yarn is on the left.


Knit 11 sts from one ear flap, then bring in another DPN to knit the remaining 2 sts.


Turn and CO 14 sts, turn (again so you have working yarn on the left) and knit 2 sts from 2nd ear flap.
Take a 3rd DPN and knit remaining 11 sts from ear flap, turn, CO 7 sts.


Join, being careful not to twist sts, to begin working in the round (you will have 54 sts altogether; 18 on each needle):

rnd 1: purl, knitting the 5 knit sts in ear flaps.
rnd 2: knit.
Rep rnds 1 & 2 3 times, then cont knitting in st st until hat measures 5" deep.

Crown ~

Prepare to decrease like this:
k9, place SM, k remaining 9 sts from needle.  Rep this on each needle, so you have 3 SMs in the centre of each needle.


Decrease ~

rnd 1: k until 2 sts remain before SM, k2tog, k until 2 sts remain on needle, k2tog.
rnd 2: knit.
Rep rnds 1 & 2 7 times altogether, until 12 sts in total remain.
Cut yarn leaving a 5" tail.  Thread this onto a yarn needle and slip each st purlwise, pulling tight to close the hole.  Secure and sew in all loose tails.


Bear Ears (make 2) ~

CO 3 sts.  Knit 1st row.  Turn.
row 1: k1, m1, k1, m1, k1 (5 sts).
rows 2 & 3: knit.
row 4: k2, p2, k2.
row 5: k2, m1, k1, m1, k2 (7 sts).
row 6: k3, p3, k2.
row 7: knit.
Rep rows 6 & 7 once more.
BO, leaving a long enough tail to sew the ears to the hat.
Using the picture as a guide, sew ears to hat.  


Using your scrap of brown yarn, embroider the sleepy bear eyes and nose - either copy how I did it using the picture as a guide, or make up your own.


All done!  And now I might just make a whole family of these... And try out various ear-style possibilities...

Related Posts Plugin for WordPress, Blogger...