Showing posts with label autumn. Show all posts

Sunday, 28 October 2012

The Hooded Simon - a knitting pattern

Will I be shot by the Sun-lovers if I admit that I'm in trans-seasonal bliss right now? The temperatures are erring towards freezing and the clocks have gone back eliminating another hour of sunlight; there are still heaps of crispy Autumn leaves everywhere fresh for the frolicking, and still a week to go before all the fireworks and mulled wine and toffee apples... It is getting seriously cold though. Perfect timing, then, to make a start on this year's snood, or Simon, as I will from now on be calling them, thanks to Kathryn of Yes I Like That. Made from Toft's chunky alpaca yarn and 10mm circular needles, this guy was knit in an evening and a half and has been warming my scalp ever since. Here's how:


You will need:
Gauge: 10 stitches / 14 rows = 4"


Cast on 60 stitches. Being careful not to twist your stitches, join to work in the round.
Knit 6 rounds of garter stitch (knit one round, purl one round, repeat).
Knit approx 22 rounds of stockinette stitch (just knit rounds), or until your snood is as deep as you want it to be around your neck.
Next round: knit 17, purl 26, knit 17. This sets up the width/depth of the hood. To adjust, increase or decrease the number of knit stitches either side or the purls - and obviously decreasing/increasing the number of purls accordingly to keep the number of stitches in the round consistent. This hood was designed to sit perfectly on the head as in the picture, therefore I would advise against making the hood shallower.
Next round: knit.
Repeat the last 2 rounds twice more.
Next round: knit 20, bind off 20 stitches, knit 20.

Working the hood:

Now, still on the circular needles, but now working in rows knitting the hood back and forth:
Row 1: purl 37, knit 3.
Row 2: knit 37, purl 3.
Continue in this manner, repeating rows 1 & 2 until your hood reaches your desired length (mine is quite long - it's to hold all my hair, of which I have a lot).
End on a knit row - as if you were just about to begin another row of purls.

Closing the hood:

The best way to close the hood (in my opinion) is with the kitchener stitch: holding the needles together (wrong sides of the work facing), cut the yarn leaving a nice long tail (about 4 times the length of what you'll be stitching o be safe). Thread on a yarn needle and following this great video tutorial, close the hood with the kitchener stitch.
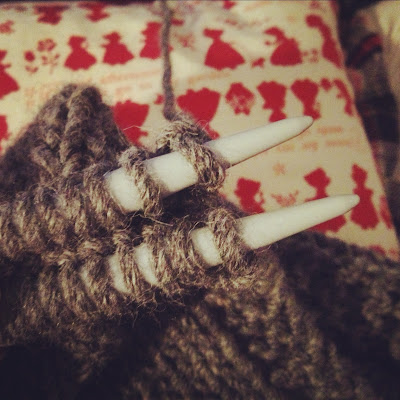

You could, alternatively, cast off at this point and with right sides together stitch the top of the hood closed, or cast off both sides of live stitches with a 3 needle bind off. Man, wouldn't it be fun to make knitting technique video demonstrations? But in a really fun (& still instructional) way...?


With the advantage of hindsight, next time I make this I will avoid the silvery grey colour... Let's face it - I'm reminding you a bit of a knight in a chain maille hood, am I right?? A super cosy knight, mind you.

Friday, 26 October 2012

Pre-menstrual sewing plans*

*Warning: this post is has a fundamentally feminine undertone. If you are a man, and you find 'time of the month' talk offensive/nauseating/unfathomable, look away now. Or, for a little insight into the workings of a pre-menstrual mind, keep reading...

As I mentioned in my interview at Stitch & Witter, I am one of those sewists whose self-stitched wardrobe is firmly rooted in "too much frosting, not enough cake" territory - a term so perfectly coined by Sewaholic's Tasia. Always planning to make more everyday appropriate attire, but so often getting distracted by delicious fabric and vintage patterns better suited to cocktail dresses. Kidding myself by thinking that the more silk skirts I make, the more I'll be encouraged to dress accordingly every day. So has this become my reality? Do I take my son to school wearing sheer tulle princess skirts? Do I swan about in Sainsbury's in floor sweeping dipped hem dresses? The answer my friends - and sorry if this comes as a disappointment - is no, I most certainly do not. In reality, I like to stay in my pyjamas for as long as is socially acceptable. And this desire to be as comfortable as humanly possible without being naked, is at no time more heightened than during that week. You know what I'm saying here - that week just before the painters set up camp in my uterus, I hate everything my wardrobe has to offer (except for my pyjamas). 

And so it was the other day, as I sat glaring at all the things I didn't want to wear, I decided I would, right there and then, make a list of things I'd be happy wearing whilst feeling my worst. This is it guys, my pre-menstrual sewing agenda - time to start stitching up some cake and give the frosting a rest.

First up, and keeping to the pyjamas theme, I've been meaning to make a pair of slouchy silk peg leg trousers for yonks. Soft and slinky, low slung and worn with a t-shirt and cashmere jumper... aaahh bloody bliss. I've yet to find a pattern so any suggestions would be most welcome, if not I'll be drafting up these babies myself.

like this but silk - image source

The next thing I always imagine myself reaching for on those grouchy mornings is a loose, swingy blouse in a bright happy fabric... and I think I've found just the thing in my new Japanese pattern book, Simple Chic. 


A recent online trip to Etsy left me completely smitten with Japan Lovely Crafts' selection of pattern books (and the completely adorable Nobuko who runs the shop), most of which seem to be designed with pre-menstrual women in mind! Easy wearing and slouchy, yet somehow clean and contemporary at the same time. I already had the perfect fabric for C-2: the small collar blouse, and am cutting as we speak:


I am a firm believer that a girl can never have too many knits, especially when cramps need nursing, but for someone who believes this so wholeheartedly, I have far too few. I am ashamed to admit that despite the fact that I have been knitting for five years (and crocheting for 20), I have only ever made myself one cardigan. Countless scarves, snoods, hats, baby things, mittens, socks etc etc etc... but only one cardigan. Right now I'm still struggling to finish a cabled jumper I started this time last year, but more about that later.

I wish I had the patience (and a few extra hours in the day) to embark on a project of such perfection as this swing jumper being knit right now by Heather Lou, but I know I'd be knitting it from now until forever so I'm thinking about cheating ever so slightly... what if I found some lovely chunky knit wool fabric and stitched up something along these lines:

image source

Oh, the coze.

Next up, and this kind of goes without saying, are a bunch of jersey tops. Another thing that one can never have too many of - and I already have a fair few of Dixie DIY's short sleeved swing tops. But it's pretty damn cold these days so I'm going to take one day of quiet over half term to churn out a few long sleeved tops; maybe I'll even get a chance to try out Dixie's brand new Hot Cocoa Sweater pattern (free to download here!). 

Lastly, and perfectly completing my 'period closet', I want to make a drapey jacket/cardigan type thing.  Two patterns have caught my eye: another from Simple Chic, and a sleeveless version from an old Burda:

Looking at them together now, I think I'll be going for the Simple Chic pattern - not only am I too lazy right now to draft a sleeve, but also I think the Burda pattern has a bit too much swing, lending it more of a maternity vibe. I have the perfect fabric for this in my stash too - a light and crisp, yet weighty linen - however it is a difficult shade of cornflour blue (what the hell was I planning to make with cornflower blue linen??)... but I plan to rectify that with some black dye. 

I'm feeling very excited about this list girls; finally a plan to make some bits that might see some real action for a change. Meanwhile I'm still reassuring my silk dresses and see-through skirts that the perfect party for them is coming real soon...

Tuesday, 8 November 2011

10 Days In The Life Of Herman


10 days ago my neighbour gave me a little tupperware containing "Herman" - a sourdough cake mix that has been fermenting, growing, being divided and passed on since I really don't know when.  Apparently these things can keep going for years.  As long as the batter is kept "alive" - at room temperature, stirred every day, added to on days 4 & 9, then divided into 4 equal parts, 3 of which are then passed on to friends and the remaining quarter kept, added to a little more and baked.  It's basically a batter consisting of flour, sugar and milk.  The milk ferments and that's what makes it bubble, what gives it that stench (which I've actually come to quite like now), and what essentially makes it a sourdough batter.


So I did my bit, loving the process - I always love to prolong any project with a process - waking each morning to see how my little Herman was bubbling and expanding, talking it up at the school gates to get some potential takers for Herman's next foster home.  And so, yesterday, three quarters of the litre of Herman I ended up with went on their way to three loving mothers, and this morning I completed the final stage of my task...


Adding yet more flour, sugar, eggs, oil, apples, sultanas, cinnamon, etc Herman was transformed from a putrid, bubbling slurp to a mouth watering, appropriately Autumnal, apple sourdough cake!


But what I want to know is, where did he get the name Herman??

Monday, 7 November 2011

Preparing for Autumn ~ part VII ~ Finale


It's done!  My Swing Jacket is finally done!  And actually, it was done a week ago, I have just been really slack about taking pictures of it.


(skirt by From Somewhere)

This has been one hell of a process, believe me.  Not because it was outrageously challenging to sew or anything, just because somehow, one thing after another, it was one of those projects that got done in little bursts of motivation, and kept having to be put down for one reason or another, and don't even get me started on the lining... I love silk, but it can be such a slippery pain to work with, especially when it has to be oh so precisely blind stitched by hand... I tell you, I was ready to take that fiddly little pesky needle and do some damage on more than one occasion.


But I'm thrilled with how she's turned out - and she really feels like a she, you know?  Strong, confident and capable, a real woman of a jacket, oozing with understated feminine elegance.  Sort of like how I feel on a good day!


The details came together beautifully - which I must confess are usually an afterthought for most of my projects, but I knew that this one deserved so much better (and actually so will all future projects from now on - sewing resolution) - the perfectest buttons narrowed down from a selection of already perfect buttons, the cape's original label which I kept and replaced, my Grandmother's diamond harp brooches (they really make music!) taking pride of place on her lapel.


And one last confession - the real reason it took so long to getting round to taking pictures is that I was initially a little disappointed... When I first tried my now beloved Swing Jacket on, I felt swamped.  I hadn't expected her to be so big; I guess I'd ignored the generous width in the sleeves; I wondered if, after all that, I'd made her too big.  I re-checked the pattern and not only was the size fine, I noticed that the elegantly drawn lady in the picture looked equally swamped by her illustrated jacket.  And she looked great.  So I tried mine on again.  I fiddled with my hair, I took off my jeans and put on a pencil skirt, I stood on tip-toe.  I got into character.  And then I started feeling it: like the best things in life, this jacket is a real grower.


Wednesday, 19 October 2011

Pine Cone Garland


Following a few visits to Kew Gardens over the last month, I have found myself with an abundance of pine cones...


...Some we painted, ready to be strung and hung as Christmas Tree decorations.  But Christmas is still 9 weeks away...


...Then I got inspired after seeing this tutorial from Twig & Thistle and made me a little pine cone garland using screw hooks and some Tyrolean ribbon my Mum gave me years ago.  It's always nice to bring a bit of the outside in, paying homage to the seasons, but despite all my efforts to greenify my fingers, most living plants I come into contact with don't last long (except my beloved Cherry Tree).  So... maybe I'll have more luck adorning my house with a plant that's already dead!


Saturday, 15 October 2011

Preparing for Autumn ~ part VI

It's always a strangely bittersweet mix of emotions coming to the end of a project.  As I go ticking off the things on my Preparing for Autumn list I compiled back in July, I find myself feeling satisfied and efficient (and warm!) but also slightly sad to have to put it behind me, having enjoyed the process so much.


But really it's ok - I get to enjoy the fruits of my labour and you can be sure I have an ample supply of to-do lists in the waiting.  And that is why I can't stop crafting: my life is creative and productive, never boring, always learning and improving, a world of infinite possibilities...


My Big Herringbone Cowl, finished just in time as the temperature dropped.  I am completely in love with this stitch - so elegant and subtly interesting, unlike most knits I've seen, without an obvious knit or purl in sight.  To see the journey I've taken in the making of this snood - which began life as an old Maxmara cardi - see here.

Friday, 14 October 2011

Caramel Apple Steamed Pudding or The Most Delicious Thing I've Ever Made. In My Life. Ever.


For a while now I have been aware of a distinctly fruity theme that seems to be at the heart of my baking.  Something about the way fruit reacts to being cooked, the soft squishyness of it, the way the flavours are dictated by the seasons... The silky smooth marriage of bananas and chocolate, the jewel-like glow of a plum upside-down cake, the sweet tang of baked apples... No surprise then, that my new favourite book is Rustic Fruit Desserts; arranged by season with recipes that make you want to lick the pages.

source

Since getting this book, one recipe has really sucked me in.  Maybe it's just because I love all things Autumnal, and I seem to have an endless supply of delicious Norfolk apples (thanks to a certain culinary friend)... And the Caramel Apple Steamed Pudding certainly did not disappoint.  Essentially an apple upside-down cake, but add to that a pudding mould that has been lined with homemade caramel, apple slices that have been caramelised, and a cake that has been steamed au bain marie for 90 minutes.  The texture reminded me of the sticky toffee puddings I used to have as a child at my Grandparents' house - soft, dense but fluffy (as much as I hate the word, it can only be described as moist), the sticky sweetness  perfectly balanced out by the ever so slightly tart apples.  In fact, it was so delicious that we ate in silent appreciation, with just grunts, groans and mmmm's being the only sounds to escape our lips.

Friday, 7 October 2011

Beanbags - a quick tutorial


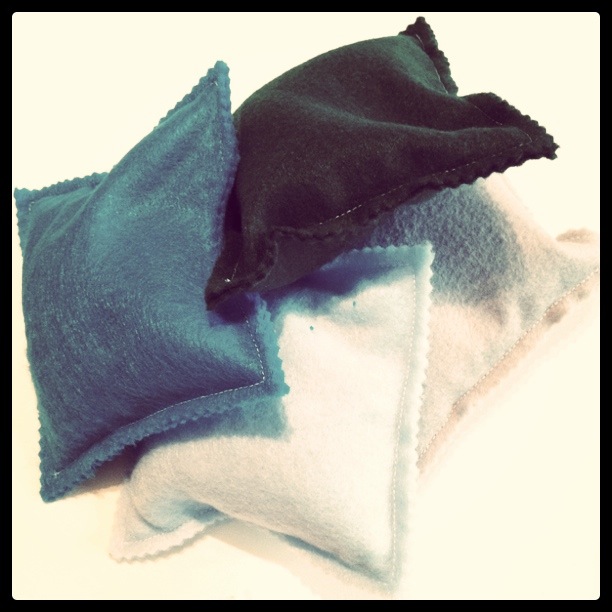
With the mornings getting a notch frostier every day, I think our days of kicking a football around the garden this year are numbered.  And while I'm overflowing with cosy, crafty indoor activity ideas for the colder months, my three year old boy still has enough energy to fuel a small tractor - and no amount of cutting and sticking and baking and story reading will sufficiently exert that energy.  I draw the line at the football in the house so I thought that soft, unbouncy beanbags would be just the thing to throw around without causing too much havoc, improve my toddler's hand-eye coordination, and most importantly, wear him out!

This is such a quick project, taking only about half an hour, and the child in your life will love being entrusted with the most important job - pouring in the beans!


You Will Need:
4 x A4 sheets of felt in different colours (or enough felt/thick cotton to cut 8 x 15cm squares)
a rotary cutter or scissors
a ruler
dried beans
pinking shears


Measure and cut out 8 squares 15 x 15cm, 2 of each colour (or you could contrast the front and back).


Using a short stitch, join 2 squares together by stitching 15mm from the edges, remembering to leave an opening big enough to pour in the beans.


Get your helper to spoon in the dried beans through the opening until you have a full and squishy (but not bursting) pouch.

Stitch the opening closed, and trim off the excess edges with pinking shears.


Monday, 26 September 2011

Practice Makes...

...almost perfect.


Due to my son's intolerance to dairy products, I am always trying to find the perfect substitute for butter in my baking.  Not the easiest task.  It's true what they say: it really is better with butter.  Dairy-free and soya spreads are ok for cakes and muffins, but I'm always a little put off by the almost curdled consistency you get when you beat in the eggs.  Having said that, I find the cooked confection to be fine consistency-wise, and passable taste-wise.  But when baking biscuits or pastry, soft spreads should be avoided like the plague - the dough is always too soft and greasy, and the biscuits are never firm and crunchy.  

Then recently I had a flash of inspiration while buying my son's favourite goat's yoghurts pots.  Goat's butter, of course!  Just as hard and firm as a cold slab of cow's butter, and still essentially, well, butter.

So to test it out, and practice for Halloween, I came up with a twist on a classic gingerbread biscuit...

~ Ginger & Chocolate Biscuits ~
yield: 45-50 biscuits

350g plain flour (+ extra for dusting)
50g cocoa
1 tsp bicarbonate of soda
1 tsp ground cinnamon
2 tsp ground ginger
110g goat's butter
70g golden castor sugar
1 egg
3 tbsp rice syrup/golden syrup
icing sugar for dusting


Preheat the oven to 170 degrees.  Lightly dust a baking sheet with flour.
In a bowl, sift and combine the flour, cocoa, bicarb, cinnamon and ginger.
In the bowl of an electric mixer, cream the butter and sugar until fluffy.
Increase the speed of the mixer and beat in the egg and syrup.
Put the mixer on low speed and slowly add in the flour mix until you get a nice, firm dough.
Dust a clean surface and a rolling pin with flour and roll out your dough to about half a cm thick.
Using a cookie cutter, cut out your shapes and transfer to the baking sheet, leaving a little space between each biscuit.


Tip: to avoid breaking the delicate dough as you peel it off your surface, dip a palette knife in some flour and see how easy it is to transfer the biscuits to the baking sheet!

Bake for 8-10 mins and leave to cool completely on a wire rack.
Once cool, dust lightly with icing sugar.


The goat's butter proved to be a huge success.  The biscuits were perfectly biscuity and not a hint of goatiness, which I was a bit worried about.  Delicious.  However, there's always room for a little improvement so next time I might substitute the ground ginger for freshly grated ginger, and find a way to get some melted dark chocolate in there too... Just to really get the most out of the flavours.

Sunday, 25 September 2011

Sleepy Polar Bear Hat - knitting pattern

There's nothing quite like a cute, cosy hat for your kid that knits up super fast to make you feel like the queen of domestic productivity.  So good, it had to be shared.


~ Sleepy Polar Bear Hat ~

Materials
2 x 100g skein of bulky-super bulky weight yarn (I used some delicious local natural yarn I found in my favourite craft shop which was unlabelled)
scrap of brown yarn, to embroider the bear's eyes and nose
set of 5 7mm DPNs
3 stitch markers or scrap yarn
yarn needle

Gauge: 1" = 3 stitches / 4.5 rows
Size: Child, fits ages 2 - 4

Abbreviations
k - knit
p - purl
st st - stockinette stitch
k2tog - knit 2 stitches together
st(s) - stitch(es)
rnd - round
cont - continue
rep - repeat
SM - stitch marker
CO - cast on
BO - bind off


Starting with the ear flaps ~

CO 4 sts.  Knit 1st row.  Turn.
row 2: k1, m1, k2, m1, k1 (6 sts).
row 3: knit.
row 4: k1, m1, k4, m1, k1 (8 sts).
row 5: knit.
row 6: k4, m1, k4 (9 sts).
row 7: k4, p1, k4.
row 8: k4, m1, k1, m1, k4 (11 sts).
row 9: k4, p3, k4.
row 10: k4, m1, k3, m1, k4 (13 sts).
row 11: k4, p5, k4.
row 12: knit.
row 13: k4, p5, k4.
Rep rows 12 & 13 3 times altogether.  Cut yarn, keeping sts on the needle.  Make another ear flap in the same way.

Hat ~

CO 7 sts.  Turn the needle so the working yarn is on the left.


Knit 11 sts from one ear flap, then bring in another DPN to knit the remaining 2 sts.


Turn and CO 14 sts, turn (again so you have working yarn on the left) and knit 2 sts from 2nd ear flap.
Take a 3rd DPN and knit remaining 11 sts from ear flap, turn, CO 7 sts.


Join, being careful not to twist sts, to begin working in the round (you will have 54 sts altogether; 18 on each needle):

rnd 1: purl, knitting the 5 knit sts in ear flaps.
rnd 2: knit.
Rep rnds 1 & 2 3 times, then cont knitting in st st until hat measures 5" deep.

Crown ~

Prepare to decrease like this:
k9, place SM, k remaining 9 sts from needle.  Rep this on each needle, so you have 3 SMs in the centre of each needle.


Decrease ~

rnd 1: k until 2 sts remain before SM, k2tog, k until 2 sts remain on needle, k2tog.
rnd 2: knit.
Rep rnds 1 & 2 7 times altogether, until 12 sts in total remain.
Cut yarn leaving a 5" tail.  Thread this onto a yarn needle and slip each st purlwise, pulling tight to close the hole.  Secure and sew in all loose tails.


Bear Ears (make 2) ~

CO 3 sts.  Knit 1st row.  Turn.
row 1: k1, m1, k1, m1, k1 (5 sts).
rows 2 & 3: knit.
row 4: k2, p2, k2.
row 5: k2, m1, k1, m1, k2 (7 sts).
row 6: k3, p3, k2.
row 7: knit.
Rep rows 6 & 7 once more.
BO, leaving a long enough tail to sew the ears to the hat.
Using the picture as a guide, sew ears to hat.  


Using your scrap of brown yarn, embroider the sleepy bear eyes and nose - either copy how I did it using the picture as a guide, or make up your own.


All done!  And now I might just make a whole family of these... And try out various ear-style possibilities...

Related Posts Plugin for WordPress, Blogger...