Showing posts with label baking. Show all posts

Sunday, 19 August 2012

On a day like today

With the inconsistency synonymous with the Summer Holidays, and with the whirlwind of work getting done in these parts as I prepare to launch a brand new line of sewing patterns,  I wanted to introduce a new regular feature on this my personal blog, and at the same time re-evaluate what I want this space to represent for me. Keeping most of my fashion related DIY projects for the By Hand Blog, Stitch me Softly will be a place for me to focus on my personal makes, share knitting & crochet patterns, recipes and home DIY's, and the bits in between that most make me happy.

On a day like today will allow me to slow down, reflecting upon and savouring those fleeting 'little things' in my life responsible for reiterating the wonder I feel (almost!) every day. 


Secretly my favourite kind of day: warm and blustery, patchy cloud and intermittent showers... 


Picking the first of the blackberries in the garden - the ones within reach at least - of which only half (if that!) make it past my boy's sneaky fingers and into the kitchen...


...Where they are gently heated them up with a splash of water and a squeeze of agave nectar, and drizzled over a chocolate cupcake... 

Later that evening, whilst watching The Land Before Time, my son looked at me and said, "I love it me and you".


Thursday, 28 June 2012

Smells like Home

I don't know why the smell of a freshly baked loaf of bread feels like home to me... If my memory serves me well (and I have an excellent memory by the way, I have even been referred to as "the elephant who never forgets"), there wasn't a whole lot of bread-baking going at home when I was little. Brown rice and lentils, yes, but bread, no (sorry Mum!). But it is undeniable - a slice of homemade bread, still warm from the oven, butter melting, a pinch of salt, that wholesome aroma finding its way around the house = Home. Maybe it's some kind of evolutionary inherited memory... Bread = we're not going to starve. We're safe. We're content.


What follows is the recipe for the absolute basic, no frills, bog standard, goes with everything kind of wholemeal bread. Simple and delicious.

Ingredients:

  • 600g strong wholemeal bread flour, plus extra for dusting
  • 2 tsp dried yeast
  • 2 tsp salt
  • 2 tsp brown sugar
  • 400ml warm water
  • 1 tbsp olive oil

Method:

Preheat oven to its lowest setting.
Put the flour into a large mixing bowl and into the oven to warm for 10 mins.
Meanwhile, boil the kettle and measure out the 400ml water, add the oil and put aside to warm down/get less boiling!
Add the remaining dry ingredients to the warm flour and mix well.
Make a well in the flour mix and slowly pour in the warm oily water, mixing as you go to form a dough.
The dough should be firm and holding itself together - if it feels too wet and sticky add a little flour; if it feels too dry and crumbly, add a little more water.
Turn the dough out to a clean surface dusted with flour. Give your hands a little dusting too. Now start kneading your dough. Knead firmly for a good 5 mins or so, adding a little extra flour if it starts to feel sticky. You want to achieve a smoothish, elastic consistency that bounces back into shape when pinched.
Dust the bowl with a little flour and put your ball of dough back in. Cover with a tea towel or clingfilm and leave to rise in a warm spot. The dough needs to pretty much double in size, which should take about half an hour.


When the dough has risen, turn it back out onto the floured surface and quickly punch out the air. You don't need to knead it again this time.
Place the dough on an oiled baking sheet or into an oiled bread tin. Cover and leave to rise one last time, again for about half an hour.
Preheat the oven to 200 degrees.
When the dough is done rising, put it straight into the hot oven and bake for 30 mins. When it's done, it should have a nice and crisp crust, and make a hollow sound when you tap the bottom.
If you baked your bread in a tin, when it's ready take it ouf the tin and put back in the oven upside down for 5 mins to crisp up the bottom and sides.

~ Now this is the important bit - eat while it is still warm!

Monday, 28 May 2012

Sacher Tortelets

Disclaimer: I am not claiming even for a second to have nailed the original Sachertorte recipe.  What follows is merely an homage to a cake not only riddled with childhood memories, but possibly one of the most delicious and elegant I have ever had the pleasure of eating.


Sacher Tortelets (makes 12)

Ingredients as for my chocolate cupcakes

plus

Apricot jam
200g dark chocolate (at least 70% cocoa solids)

Following the method for my chocolate cupcakes, prepare the mix and spoon into cupcake cases, filling them half way. Then add a teaspoon of the apricot jam and cover with a final dollop of the chocolate cake mixture.


Bake at 180 degrees for 25 minutes. Let the cupcakes cool completely on a wire rack before carefully removing the paper cases.


Melt the chocolate in a double boiler and while it is still runny, dip the tortelets in upside down, coating the entire cake, except for the bottom.  Carefully place on a plate and into the fridge to set the melted chocolate.


Once the chocolate has set, remove from the fridge and serve at room temperature with a dollop of unsweetened whipped cream.


I was very happy with how these guys turned out.  Despite being dairy-free and with a ground almond base, which I'm sure a genuine Sacher is not, they actually tasted very similar to how I remember a Sachertorte should taste.  The slightly bitter dark chocolate coating is a welcome contrast to the sweetness of the apricot jam and although the chocolate should not technically be completely hard, I like the way it securely holds these little tortelets together, snapping ever so satisfyingly as you take a bite...

Monday, 19 March 2012

A Spot of Light Springtime Baking? Not When You Eat the Entire Batch!


Of the many, many delectable looking recipes I have been accumulating on Pinterest these days, there was no more than a five minute lag time between pinning this and preheating the oven to make a batch of SophistiMom's Chewy Lemon Snowdrops.

Despite being egg and dairy-free (I replaced the butter stated in the recipe for a non-dairy olive oil spread), light and lemony, small and shareable... they were moreish to a fault and I pretty much ate the entire batch.  Which is most definitely not light nor acceptable really, especially with Easter just around the corner!  Never mind, I'll just be sure sure to do an extra ten minutes on the hula hoop tonight.

Sunday, 4 March 2012

Recipe Revealed ~ The Most Delicious Dairy-Free Chocolate Cupcakes I've Ever Eaten

So I promised you the recipe for my insanely deliciously dense chocolate cupcakes (no dairy!)... Here it is. Get ready.


~ Chocolate Cupcakes (dairy-free) ~

50g self-raising flour
50g ground almonds
30g cocoa powder
140g golden caster sugar
a pinch of salt
1 egg
200ml coconut milk (half a can)
1/2 tsp vanilla essence

For the frosting:


or

300g icing sugar, sifted
100g dairy-free spread/goats butter
40g cocoa powder, sifted
40ml rice milk


Preheat oven to 180 degrees.  Line a cupcake tray and set aside.
In a bowl, sift together all dry ingredients and mix well.
In another bowl, combine wet ingredients.
Slowly add wet bowl to dry bowl and mix well until fully incorporated.
Spoon mixture into the cupcake cases and bake for 15-20 mins (I like mine to have a bit of a gooey fondant-esque centre so I take them out after 15 mins.  If you like yours well done, bake for 20 mins, or until a skewer inserted comes out clean).


A few words on frosting:  Dairy-free frosting can be tricky.  If you are substituting butter for a dairy-free alternative (which tend to have more of a soft margarine-like consistency) it can be much harder to achieve a firm frosting that keeps its shape once piped.  Make sure you refrigerate the frosting for a good hour or two before attempting to pipe, or alternatively, simply slather it on, Hummingbird Bakery style.  If you're using goats butter, the consistency will be fine, as if you were using regular butter, but watch out for a very subtle goaty kick!  I personally don't mind this, and if you're the kind of person who likes cream cheese frosting, you probably won't even notice.  Another option for frosting, my current favourite in fact, has a whipped coconut milk base (see above link for recipe).  You'll need to have a bit of foresight for this though as the opened, unshaken can of coconut milk needs to be in the fridge overnight to get sufficiently firm.  No impromptu cupcake baking with this method I'm afraid.


So there you have it my friends.  My secret recipe is out.  Spread the love.  Sharing is caring.  And above all, enjoy!


Saturday, 3 March 2012

Catching Up

Can it really be March already?  Almost a quarter into 2012 - already??  Wow.  Time certainly does fly when you're having fun // deliriously scheming new business schemes // working on a million projects at once.  In fact, I think I spent most of February trying not to spread myself too thin.  Looking back, or rather, flicking through the pages of my Filofax to recap, I can see that, despite not having much in the way of finished pieces to show for it, I actually did do a whole lot over the last four weeks: scheming sessions and meetings aplenty, kiddy parties and half term activities galore, three trips out of London... all with a constant undertone of knitting needles clicking and sewing machines whirring.

So, in the interest of taking myself a step back from everything I've got going on to take stock (fighting my way out of a sea of to-do lists and UFO's), I have compiled a(nother) list of what's going on...

...In my studio

  • Minoru Jacket.  Having made an excellent start at the beginning of Tasia's Sew-Along, I then slightly put it to one side for a couple of weeks whilst prioritising other projects with actual deadlines.  But I had a little studio springclean the other day (inspired by Joanne's sewing room transformation) and instantly felt myself overwhelmed with renewed inspiration and got stuck straight back in.  It's amazing what two evenings' work can achieve - all I have left to do is stitch the lining wrists, gather the waist and sew the hem!  And I couldn't be more thrilled with how it's turning out.  I'm using a post-box red cotton twill, a supersoft brushed cotton tartan for the main lining and a slippery silver poly to line the sleeves.  I've omitted the hood but added side-seam pockets.
  • Surf Skirt.  When I saw this fabric on a recent trip to Goldhawk Road (important: join the petition to save the legendary Goldhawk Road fabric shops from demolition here!), I immediately imagined making an entire new Summer wardrobe using this cotton.  I guess it's probably a little silly to spend an entire season in surf print... So I'll start with a pleated miniskirt, which I thought I may as well put together as a tutorial... Watch this space.  And get down to Classic Textiles on Goldhawk Road to get in on the surf skirt action!
  • Still working on the Quilt, and a real life Wedding Dress for a friend (which, for obvious reasons, I won't be able to post any progress pictures of until after the wedding!).

...On my needles

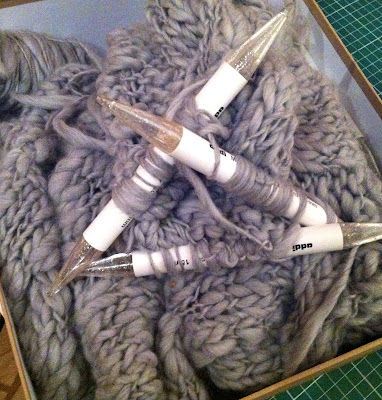
  • Pickles' Close Cables Sweater.  Man, this has been on the go since October!  Which is insane - the yarn is so chunky and the needles so humungous it should have been doable in a week.  But it's proving a bit of a nightmare to handle - the needles are too huge and the yarn too irregular.  I've spent the last couple of years pretty much exclusively knitting chunky... But after this I don't think I'll want to see anything a needle fatter than 8mm for a while!
  • The Wonderful Wallaby.  This cult classic of a knitting pattern has been a regular feature on my to-make lists for months, and now that I'm free of the chunky yarn spell, I have finally cast on for the Willie Wallaby (size 4 - which already looks like it'll be too small for my three-and-a-half year old!) using a khaki green wool/alpaca blend and what feels like a very spindly 4mm circular needle!
  • The beginnings of a cropped jumper I'm making up as I go along.  In my mind, this will be the perfect top to my Surf Skirt...

...In my kitchen

  • I have barely been able to contain my excitement as Spring has truly sprung in the last week!  So it seemed only fitting to bake a little welcome offering in the form of this Rosewater Angel's Food Cake (recipe same as my Lavender Angel's Food Cake, just substituting the lavender water for rosewater).  
  • Sticky toffee pudding... Promising myself this will be the last caramel sodden cake I bake until Winter comes around again.  Damn, was this a good one.
  • Yet another batch of my infamous dairy-free chocolate cupcakes for a kiddy party.  I don't think I should keep this recipe to myself much longer... something this good needs to be shared!  Recipe coming soon - in the meantime, be sure to stock up on coconut milk and ground almonds...


Sigh... weight lifted, mind de-cluttered and consolidated.  Onwards and upwards.

Tuesday, 31 January 2012

Eggy-Bear Bake


These days I'm finding myself increasingly traumatised by the words, "Can I have a sna-ack?".  But one snack is never enough.  Especially on cold January evenings after an action-packed afternoon at nursery. 

"Can I have another snacky-wacky-woo???"

I'm all for a bit of snacking, but as a mother, my main concern is that after 3 rice cakes with honey, a snack bar, half an apple and God-knows-what-else, he won't eat his dinner.  

Enter the bear shaped baking mould.  Instead of snacking, I entice him with the promise of cracking eggs and a bear shaped dinner.  It's pretty exciting.  And as long as I get the butternut squash in the oven to roast and the mushrooms sautéeing the second we get in from school - while he has his perfectly acceptable snack #1 - getting him to crack eggs into the moulds and spoon over the vegetables and watch them bake (for 7-10 minutes), manages to hold his attention long enough to put off his asking for another snack before dinner is ready.


And he thinks that eating an eggy teddy is pretty funny too.

Tuesday, 10 January 2012

Actually Really Healthy Cupcakes

While most of us girls begin a new year with ambitious goals of health and fitness, all those Christmas feasts usually equal a stretched out stomach that insatiably screams to be fed for weeks after, making it very hard to curb the apetite... That, and certain Bourbon Custard recipes popping up on my reader...

And so it was on this grey afternoon, unable to shake that permanently peckish feeling, I gave in and made a batch of cupcakes.  However, having just seen a pretty healthy recipe over at Jennifer Casa's blog I was determined satisfy my cravings and do my body a favour at the same time.


Using Jennifer's recipe as a vague guide (omitting the yoghurt as my son is allergic to dairy), I came up with the following recipe which is not only delicious but really is packed with super healthy ingredients and not a gram of crap.  As most of the ingredients are wet, I have done the measurements in cups as opposed to weight.

~ Peanut Butter Cacao Cupcakes ~

1 egg
1/3 cup manuka honey (ultra antibacterial and immune system boosting)
1/3 cup agave nectar (honey-like syrup, very low GI, even ok for diabetics)
1/3 cup rapeseed oil
1/2 tsp vanilla extract
1 cup self raising flour
1/3 cup crunchy peanut butter or almond butter even better
2 tbsp ground flax
1/3 cup raw cacao nibs (insane health benefits)

Preheat oven to 180 degrees.
Mix all wet ingredients in a bowl.
Sift in flour and incorporate.  
Mix in the peanut/almond butter, flax and cacao.
Spoon the mixture into 12 cupcake cases and bake for 15 mins.
Eat while still warm... and don't feel too bad about having another!


Sunday, 11 December 2011

My Kind Of Feminism

This week I will mostly be: cake-bakin' & wood-choppin'...


...that's right, with an axe.


Christmas Spice Cupcakes for this season's festivities, and freshly split Maple logs to be dried out ready for next Winter.

Tuesday, 8 November 2011

10 Days In The Life Of Herman


10 days ago my neighbour gave me a little tupperware containing "Herman" - a sourdough cake mix that has been fermenting, growing, being divided and passed on since I really don't know when.  Apparently these things can keep going for years.  As long as the batter is kept "alive" - at room temperature, stirred every day, added to on days 4 & 9, then divided into 4 equal parts, 3 of which are then passed on to friends and the remaining quarter kept, added to a little more and baked.  It's basically a batter consisting of flour, sugar and milk.  The milk ferments and that's what makes it bubble, what gives it that stench (which I've actually come to quite like now), and what essentially makes it a sourdough batter.


So I did my bit, loving the process - I always love to prolong any project with a process - waking each morning to see how my little Herman was bubbling and expanding, talking it up at the school gates to get some potential takers for Herman's next foster home.  And so, yesterday, three quarters of the litre of Herman I ended up with went on their way to three loving mothers, and this morning I completed the final stage of my task...


Adding yet more flour, sugar, eggs, oil, apples, sultanas, cinnamon, etc Herman was transformed from a putrid, bubbling slurp to a mouth watering, appropriately Autumnal, apple sourdough cake!


But what I want to know is, where did he get the name Herman??

Monday, 31 October 2011

Chain Cake

Maybe it's because All Hallow's Eve is upon us, but bizarre things are going over here...

In the early hours of this morning, my neighbour popped over and handed me, rather frantically, a tupperware holding a smelly, putrid "cake-mix" called Herman.  Yes, apparently this cake-mix is alive and male.


She explained that this was a chain cake: same idea as a chain email - pass it on to 10 friends or you get nothing but bad sex for the rest of your life - but with a chain cake someone makes the original mix, divides it into four (keeps one 1/4 and passes the other three on), the recipients add to the mix and stir it for a handful of days, divide it and pass it on... I have no idea how long ago the mother-mix was conceived, and judging by the bubbles my little Herman is producing, this cake-mix is most definitely alive; and going by the stink...  undoubtedly male.

These are my instructions:


Happy Halloween!

Friday, 14 October 2011

Caramel Apple Steamed Pudding or The Most Delicious Thing I've Ever Made. In My Life. Ever.


For a while now I have been aware of a distinctly fruity theme that seems to be at the heart of my baking.  Something about the way fruit reacts to being cooked, the soft squishyness of it, the way the flavours are dictated by the seasons... The silky smooth marriage of bananas and chocolate, the jewel-like glow of a plum upside-down cake, the sweet tang of baked apples... No surprise then, that my new favourite book is Rustic Fruit Desserts; arranged by season with recipes that make you want to lick the pages.

source

Since getting this book, one recipe has really sucked me in.  Maybe it's just because I love all things Autumnal, and I seem to have an endless supply of delicious Norfolk apples (thanks to a certain culinary friend)... And the Caramel Apple Steamed Pudding certainly did not disappoint.  Essentially an apple upside-down cake, but add to that a pudding mould that has been lined with homemade caramel, apple slices that have been caramelised, and a cake that has been steamed au bain marie for 90 minutes.  The texture reminded me of the sticky toffee puddings I used to have as a child at my Grandparents' house - soft, dense but fluffy (as much as I hate the word, it can only be described as moist), the sticky sweetness  perfectly balanced out by the ever so slightly tart apples.  In fact, it was so delicious that we ate in silent appreciation, with just grunts, groans and mmmm's being the only sounds to escape our lips.

Thursday, 6 October 2011

Monday, 3 October 2011

Yuk


Looks delicious.  Smells delicious.  Tastes.  Like.  Shit.

Don't get me wrong - I'm all for healthy eating, but there's something about (specifically sweet) Macrobiotic baking that puts me off.  I just don't ever salivate at the thought of things like couscous cake with a creamed tofu carob frosting, for example.

We have this book at home, The Natural Gourmet, which, if I'm in the right mood, is very appealing.  All the talk of elements and biorhythms is right up my street.  And the savoury recipes are genuinely delicious. But today I made the mistake of trying out an Orange and Walnut Loaf Cake recipe from this same book.  I made it so lovingly and entirely by hand, not an electric mixer in sight, and feeling so pleased with myself and how I'd picked a recipe who's "Major Phase" was Earth, apparently perfect for an Indian Summer blah blah blah...  And when it came out of the oven, it looked so perfectly rustic, smelled so fragrant and orangey...  And somehow it tastes like a tasteless gluey crunchy squelch with a hint of orange.  Exactly the kind of thing you'd buy - and quickly regret - in a health food store if you were feeling a bit peckish while paying for your echinacea/wheatgerm/organic cotton tampons.  Oh well.  You live and you learn.  No more hippie baking for me.

Monday, 26 September 2011

Practice Makes...

...almost perfect.


Due to my son's intolerance to dairy products, I am always trying to find the perfect substitute for butter in my baking.  Not the easiest task.  It's true what they say: it really is better with butter.  Dairy-free and soya spreads are ok for cakes and muffins, but I'm always a little put off by the almost curdled consistency you get when you beat in the eggs.  Having said that, I find the cooked confection to be fine consistency-wise, and passable taste-wise.  But when baking biscuits or pastry, soft spreads should be avoided like the plague - the dough is always too soft and greasy, and the biscuits are never firm and crunchy.  

Then recently I had a flash of inspiration while buying my son's favourite goat's yoghurts pots.  Goat's butter, of course!  Just as hard and firm as a cold slab of cow's butter, and still essentially, well, butter.

So to test it out, and practice for Halloween, I came up with a twist on a classic gingerbread biscuit...

~ Ginger & Chocolate Biscuits ~
yield: 45-50 biscuits

350g plain flour (+ extra for dusting)
50g cocoa
1 tsp bicarbonate of soda
1 tsp ground cinnamon
2 tsp ground ginger
110g goat's butter
70g golden castor sugar
1 egg
3 tbsp rice syrup/golden syrup
icing sugar for dusting


Preheat the oven to 170 degrees.  Lightly dust a baking sheet with flour.
In a bowl, sift and combine the flour, cocoa, bicarb, cinnamon and ginger.
In the bowl of an electric mixer, cream the butter and sugar until fluffy.
Increase the speed of the mixer and beat in the egg and syrup.
Put the mixer on low speed and slowly add in the flour mix until you get a nice, firm dough.
Dust a clean surface and a rolling pin with flour and roll out your dough to about half a cm thick.
Using a cookie cutter, cut out your shapes and transfer to the baking sheet, leaving a little space between each biscuit.


Tip: to avoid breaking the delicate dough as you peel it off your surface, dip a palette knife in some flour and see how easy it is to transfer the biscuits to the baking sheet!

Bake for 8-10 mins and leave to cool completely on a wire rack.
Once cool, dust lightly with icing sugar.


The goat's butter proved to be a huge success.  The biscuits were perfectly biscuity and not a hint of goatiness, which I was a bit worried about.  Delicious.  However, there's always room for a little improvement so next time I might substitute the ground ginger for freshly grated ginger, and find a way to get some melted dark chocolate in there too... Just to really get the most out of the flavours.

Thursday, 15 September 2011

Simple Pleasures

I am a firm believer that it is the simple pleasures, the little joys in life, that make all the difference.  You just have to notice them.  Forget the fleeting rush of a new pair of £700 shoes; the contentment that comes with being able to see the wonder in life's miniest miracles is really the key, I think, to lasting happiness.


Autumn is finally here (which, for me, is a constant source of joy in its own right), and while the days here are still warmish, late nights and early mornings are getting pretty damn chilleh.  Like, not-wanting-to-get-out-of-a-warm-bed-at-seven-in-the-morning kind of chilly.  So if the antidote to cold evenings is sleepy tea and a hottie, the way forward on a frosty morning is a healthy, hearty, warming breakfast to ease you into gear.  So yesterday I made a big batch of granola (I like mine with hot milk...).  At the risk of sounding like a hessian-clad, hairy-legged, free-lovin' hippie... as I mixed up the oats, nuts, flaxseed, wheatgerm, raw cacao, oatbran, etc etc health food shit etc, I felt so completely and blissfully aware of all the nutrition and natural goodness I was packing into my family's breakfast...


And the best part - waking up this morning to my boy saying "Mama wake up!  Let's go have a bowl of that licious ganola you made!"   And the contentment I felt as I sleepily watched him guzzle it up, knowing that no shop-bought granola could ever compare to Mama's Homemade Granola; not in nutritional value nor love content.  I was like, totally blissed out, man.

Tuesday, 6 September 2011

Jammy Almond Muffins on a Sunday Afternoon


After a massively salty Sunday lunch of gammon and roast potatoes, we were all left craving something sweet.  Not wanting to go down the heavy road of chocolate or frosting, I came up with a recipe that I think perfectly bridges the gap between fruity, light(ish) Summer baking and richer, Autumnal comfort cakes.  

~ Jammy Almond Muffins ~

110g butter or dairy-free spread
110g golden caster sugar
2 eggs
1/2 tsp almond extract
40g plain flour
100g ground almonds
1 tsp baking powder
1 tsp bicarbonate of soda
1 generous tbsp plum jam (raspberry or apricot would work too)
flaked almonds for sprinkling

Preheat the oven to 180 degrees.  Line a muffin tray with 9 muffin cases.
In the bowl of an electric mixer with paddle attachment, cream together the butter and sugar.
Slowly add in the eggs and almond extract.
Mix in all dry ingredients.
Mix in the jam, and spoon the mixture into the muffin cases.  Sprinkle a few almond flakes over each muffin.
Bake for about 15 mins, or until a skewer inserted comes out clean.  Cool on a wire rack.

Tuesday, 30 August 2011

Maple... Pecan... Cookies.


Is there anything more delicious than maple syrup? I'd be hard pressed to think of something yummier... And these Maple Pecan Cookies from Xanthe Milton's -aka Cookie Girl- adorable book Eat Me, do not disappoint.  Chewy, just the right amount of crunch, and, mmmm maple syrupy... I might even add an extra tablespoon of syrup next time, or maybe drizzle some over the cookies while they're still warm... My only complaint (of my cookies, not the recipe) is having had to substitute the soft dark sugar (which the recipe called for and I have run out of) for golden caster sugar, resulting in a somewhat albino looking cookie.


Related Posts Plugin for WordPress, Blogger...