Wednesday, 27 July 2011

Thrifting Away From Home

how to make a gif

Nothing quite like thrifting abroad... Especially little Mediterranean villages swarming with kitch crockery, retro bedding (to be repurposed) and more granny haberdasheries than Starbucks' on a high street.


Wednesday, 20 July 2011

Preparing for Autumn ~ part II


You can always count on the British Summertime for almost constant cloud cover and drizzly rain, interspersed with the odd burst of glorious sunshine (which sees everyone ripping off their parka's and practically tripping over themselves to get outside).


With this in mind, I got a head start on my first Autumnal Project - the Pickles' Go Vest - knowing I would be loving it months before Autumn even begins.  Knitted in brioche stitch with a super soft and cosy baby alpaca, this vest is the epitome of trans-seasonal dressing.  Loosely slung over a sundress and held together with a brooch on changeable Spring days or chilly Summer nights, and layered with long-sleeved tops, jeans and scarves when the colder months come.


Monday, 11 July 2011

Preparing for Autumn ~ part I

Amidst all the Summer sewing I've been doing recently, my evenings are starting to be spent preparing for the colder months to come... 

the beginnings of my Go Vest from Pickles

These days I like to get a bit of a head-start on a season.  That way I can really take my time with a project and enjoy the process, especially the big or ambitious ones, spending long evenings taking care over my stitching, and actually getting to enjoy my finished piece for longer.  I learned this the hard way - casting on for a jumper or blanket in the depth of Winter, only to run out of steam halfway through as the days began to warm up.  In fact, I can think of two such jumpers and one such blanket still incomplete hibernating somewhere at the bottom of one stash or another.  So this year I have put my list-making mania to good use and settled on a handful of wintry projects that have been on my mind for a while, which I now seem to have suddenly gathered the perfect materials for.

1.  Go Vest - pattern from Pickles, one of my all-time favourite knitting blogs.  These guys make me want to move to Norway.  For this cardi I'm using the cherry red baby Alpaca yarn I bought from Loop at Jane Brocket's book launch.  

2.  Herringbone Stitch Cowl - pattern from Purlbee, my other all-time favourite crafting blog.  This is something I've wanted to make for ages, but it calls for a lot of yarn...  Then the other day my lovely neighbour friend (Prom Dress Jess) gave me a Maxmara cardi she was throwing out - horrible shape but delicious yarn - so now I'm in the process of unravelling it...

the unwanted Maxmara cardi...


unravelling...

3.  Three pairs of Elfin Slippers - tutorial from Maya*Made.  So far I have picked out the colours for the uppers and linings from some old cut up cashmere jumpers to make a minty-green pair for the little boy, a navy pair for the Papa, and a red pair for me, la Mama.  These have been washed and shrunk to create a denser and sturdier fabric which will be easy to cut and sew, and will be a lot more durable than an un-shrunk cashmere jumper.  Now I need to have a rummage through my leathers to find some soft suede for the soles.


4.  A Swing Jacket - Butterick 5222 vintage pattern.  I've been wanting to make this jacket for years, and being an unprinted pattern, the only thing stopping me before was my lack of sewing confidence.  I am now raring to go with this, and I am also very happy to be slicing up and giving a new lease of life to my very old, very loved, and now very decrepit bordeaux wool cape.  For added yum, I plan to line this with the same nude silk crepe I used for my Silk Sorbetto... oh, YES.

my cape, soon to be swing

5.  As the days start getting colder - two pairs of Snowy Mittens - pattern still to develop.  Using some Debbie Bliss Como I bought last winter, in duck egg blue and stone, I'm planning to make some adult sized mittens with a simple fairisle cuff.  If I'm happy with the pattern, I will of course publish it here!


There.  So I reckon I have plenty to keep busy with, and no doubt some other things will manage to sneak themselves into my lists... They always do.

Tuesday, 5 July 2011

Decency...

We've all been there.  Looking in the mirror thinking, "can I still get away with wearing these hotpants/crop-top/see-through dress...?" In my case, cut-off jeans ripped quite suggestively at the crotch.  They were my favourite jeans when I was 17, I wore them until they were practically threadbare, then cut them into shorts and rocked them with half a bottom cheek peeping out.  Now I'm not so sure.  So many factors contribute to women's changing bodies, self-image and therefore wardrobes that it can be sad to leave behind clothes that were so loved back in happier, firmer bodily times.  But this morning as I mowed the lawn in my revealing cut-offs, I decided a quick patch job was just the thing to give my shorts a new lease of life.  These babies are sick of being confined to the house!

before back view

before front view

I used the same cotton as my Swing Sorbetto which I can't get enough of right now, and from a distance it sort of looks like flesh... drawing your eye in and then noticing the print as you get closer.  I like this subtle trompe l'oeil suggesting a sneaky peek of skin, without actually revealing anything at all.

after back view

after front view

inside-out detail

The Sorbetto Series

For anyone who hasn't yet made it, or -God forbid- hasn't heard of it, you need to click here to start planning your Sorbetto Series.  The Sorbetto Top, a free downloadable pattern from Colette, is perfect in its sixties summery simplicity, and is such a breeze to make that it's hard to stop at just one.  Intending to make one or two, I have ended up with four.  And it's not only me; just Google "sorbetto top" and you'll find pages and pages of blog posts and flickr pools of all the many millions of variations people have come up with (so much for having something unique by making your clothes by hand, ha!). In fact, it was thanks to Marie at A Sewing Odyssey where I first saw the Sorbetto, and Miss P for inspiring me to make one more, and then another...


Short Sorbetto No.1 - made using some leftover Liberty cotton that has been sitting in my stash for a while, and done following the pattern precisely.  It came out a little short due to lack of fabric, so this will be a tucked-in-top only.  Looks hot with a weighty red circle skirt I made a few years ago.


Silk Sorbetto No.2 - getting excited now and seeing all the variations possible with this pattern... Nude silk crepe, top-stitched box pleat sandwiching a vintage trim given to me by a late friend who shared my love of lingerie.  I can't wait to wear this one.


Swing Sorbetto No.3 - completely fell in love with the print.  I let the pleat go free on this one and added another at centre back to give it more of a swing shape which came out beautifully.  This is the one I will wear the most, already wore it today and felt very happy in it.  I'm still debating whether or not to add an off-white flower button at the top of the pleat.


an ingenious method to make bias tape without any fancy devices


Sleepy Sorbetto No.4 - a longer version of No.3.  Nightdress or beach dress.  This came out a little too Maternity-esque for my taste, so I might have a little fiddle with it tomorrow to adjust the volume.


Time to move on now.

Monday, 4 July 2011

this evening...

...I am, as ever, in bewildered awe of my beautifully talented little sister [anyone get the Four Weddings and a Funeral reference?  Probably just my sister...] after seeing her MA final exhibition...


Thursday, 30 June 2011

Raspberry Vodka

After a deliciously long weekend in the country, it was hard not to feel slightly deflated driving back to a drizzly, grizzly city.  But instead of moaning, I am taking pleasure in what we brought back... a small collection of thrifted charity shop treasures and a big batch of raspberries freshly picked this morning.

~ Raspberry Vodka ~

approx 350g fresh raspberries
75-150g golden caster sugar (depending on how sweet you like it - I like mine a little tart)
70cl Vodka (some say the cheaper the better)
an air-tight jar, very clean


Place the raspberries in the jar, add the sugar and pour over the vodka.  Close the jar and give it a really good and vigorous shake.  For the first month, you need to shake it up as often as you remember - every day if possible.  For the following couple of months just give it a shake every week or other week.  Keep it at room temperature and away from direct sunlight; I keep mine in plain view on the kitchen counter so I don't forget to shake it!  Leave your vodka to infuse for at least two months, three if you can wait.  When the time comes, you will need a clean bottle, a funnel and a sieve (or clean muslin cloth) to separate the liquid from the berries.  Your raspberry vodka is now ready to drink.  But don't throw away the boozy berries - they are delicious slightly warmed and eaten with ice cream for example, or baked in a cake, or punch...  I'm looking forward to Autumn already.

Tuesday, 28 June 2011

Calm in the Country


"Imagine a calm, serene mother, who accepts whatever life presents her with.  Unexpected or unwanted events don't rattle her.  She never overreacts.  She's aware of the times when she lacks wisdom or compassion but she doesn't waste days feeling guilty, she might do better next time.  She's self-aware, but because she has fostered self-love, she is not self-conscious or self-absorbed when she talks to others.  Her friends say she is gentle and kind in a genuine way.  Her brothers and sisters add that she is clear in her thinking and good at making decisions.  She seems to make others feel comfortable, special even, and there's no shortage of people who love her.  Her children delight in her company for she makes them feel important and understood.  She's creative, spontaneous and quick to laugh because no matter what she's doing, life is play, not work."


I am by no means the woman described in this passage, or even a practicing Buddhist for that matter, but when I read this book when I was pregnant, this paragraph stuck.  I had thought plenty about the kind of mother I wanted to be, and it was this idea of mindful mothering that felt natural and right for me.  Whenever I am experiencing all those motherly highs and lows I seem to have this passage in my mind, either reminding me to take a minute to re-approach a situation calmly and mindfully, or allowing me to feel proud, not only of my boy (because obviously I am overflowing with pride for him at all times!), but proud of myself and the mother I am growing up to be.

Saturday, 25 June 2011

Sweet Little Things


Kids really get it good, clothes-wise.  With free reign to express their emerging identities, and no social norms to adapt to, the experimental business of dressing oneself has no limits in the life of a child.  PJ's, superhero/dino/princess costumes, blinding clashes of print and colour, wacky outfit combos like army shorts+leggings+moonboots+hand socks (in the case of my son!); all of these are perfectly acceptable, and completely adorable, daily attire for those under the age of 10.  And so how wonderful to be able to make the mini outfits that capture and feed their imaginations, becoming a whole lot more than just clothes but instead tools to express their developing personalities.  One woman, Liesl Gibson of Oliver + S, and her captivating book, Little Things To Sew, has created a collection of clothes and accessories for kids that encourage their need for imagination and expression on a daily basis, and with her step-by-step clarity, these are projects that are approachable for even a novice sewer.  And I must confess, there are a few projects in there that I might just have to make in grown-up size... 


This little skirt I made this morning for my neighbour's little girl who turns three on Monday.  Inspired by Liesl's book, I used a leftover strip of Liberty fabric, two layers of cherry pink netting and elasticated the waistband to make a pretty tutu in under half an hour.

The Explorer Vest was the first thing I made from Little Things To Sew - it seemed like the perfect possible accessory to the daily adventures of a little boy.  All those collected stones, pens, wiggly worms have to go somewhere, and the Explorer Vest has a pocket for everything.  I ended up making it way to big to fit my almost three-year-old, so here it is on my eleven year-old brother instead.  But I recently found some great army fabric in a bargain bin at a local fabric shop for another, smaller, Explorer Vest.  Especially to match his army shorts+leggings+moonboots+hand socks combo.

"Explorer Vest" from Little Things to Sew

Thursday, 23 June 2011

Prom Dress - Final Fitting

Jess in her Dress

I was actually quite nervous as I waited for Jess to try on her Prom Dress this morning.  This is the first time I've been asked, or commissioned I guess, to make something, for someone, for a special occasion.  Prom, no less.

When she came out of my studio to show me, I was horrified.  For a long moment I couldn't figure out why the bodice seemed to fit so badly despite having tailored it so specifically to her figure...  Then... phew!  She had put it on back-to-front!!

Having put it on the right way round, and hemmed the skirt, she and I are both thrilled with the result.  And now, as with all projects I've completely enjoyed making, I'm sad it's over.

Tuesday, 21 June 2011

Prom Dress Update

A few weeks back I mentioned how thrilled I am to have been asked to make my neighbour Jess' Prom Dress.  After browsing through all my patterns, she was undecided between the 50's classic Walkaway Dress and a 60's full skirted dress (see post here).  We took both patterns with us fabric shopping last week, and the moment we got to Liberty's 3rd floor, the fabrics chose the dress...


Similar to the dress I made for myself from this same pattern, Jess liked the idea of different prints making up the four skirt panels, and a plainer bodice.  So she went for the blue and red roses and the poppies for the skirt, with a soft off-white cotton for the bodice.

After a fitting yesterday, it's all looking lovely (I want to keep it!) and this morning will see me blissfully hand stitching the neck-line interfacing, shoulder lining seams, and gathering the skirt, ready to be put together and zippered for one last fitting tonight to determine the length for hemming.

Sunday, 19 June 2011

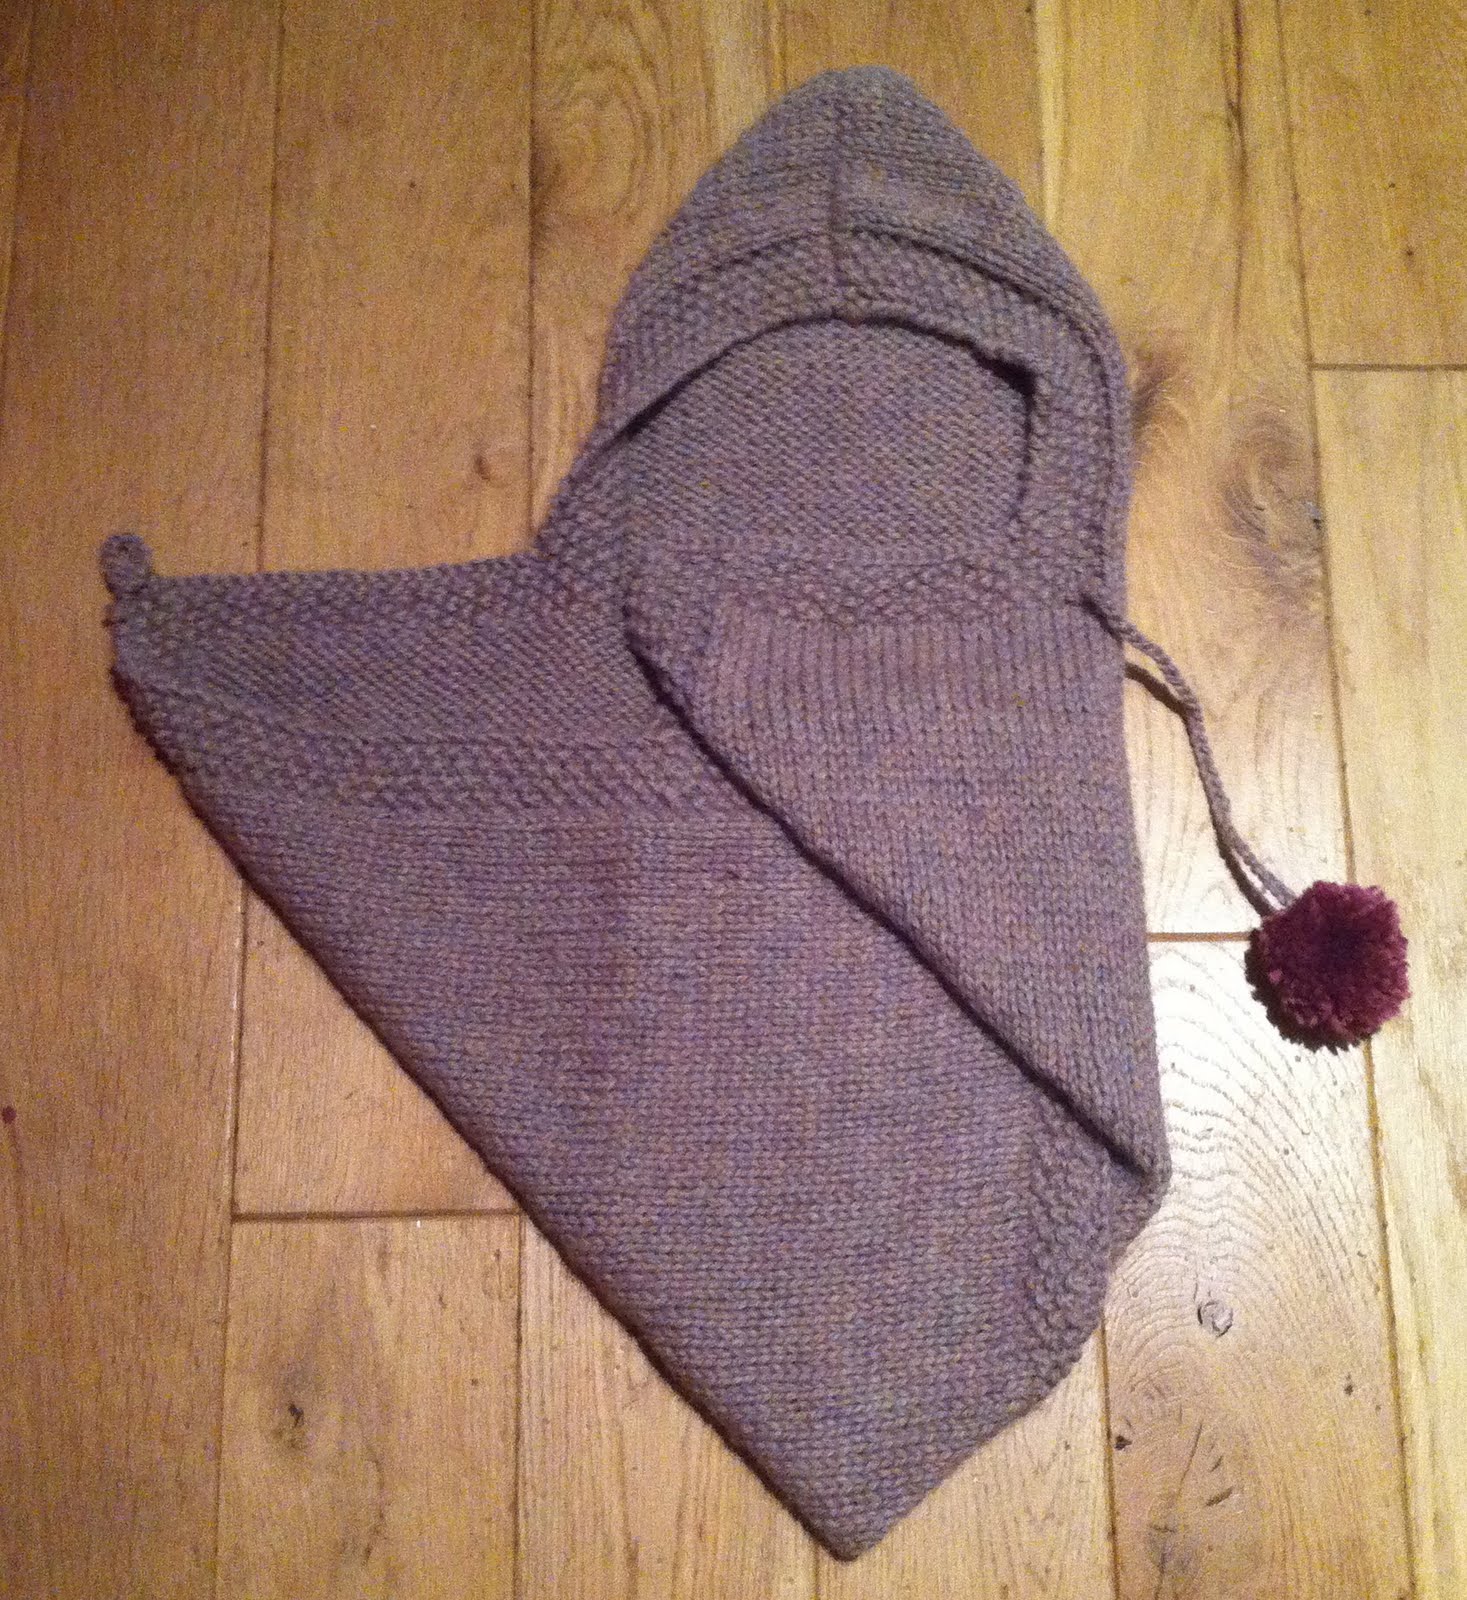
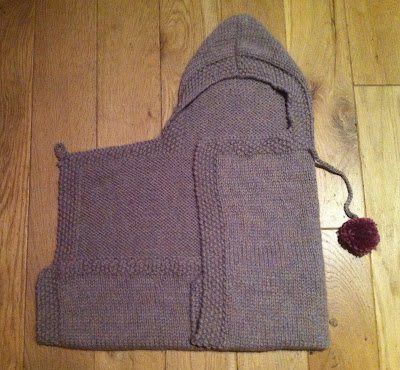
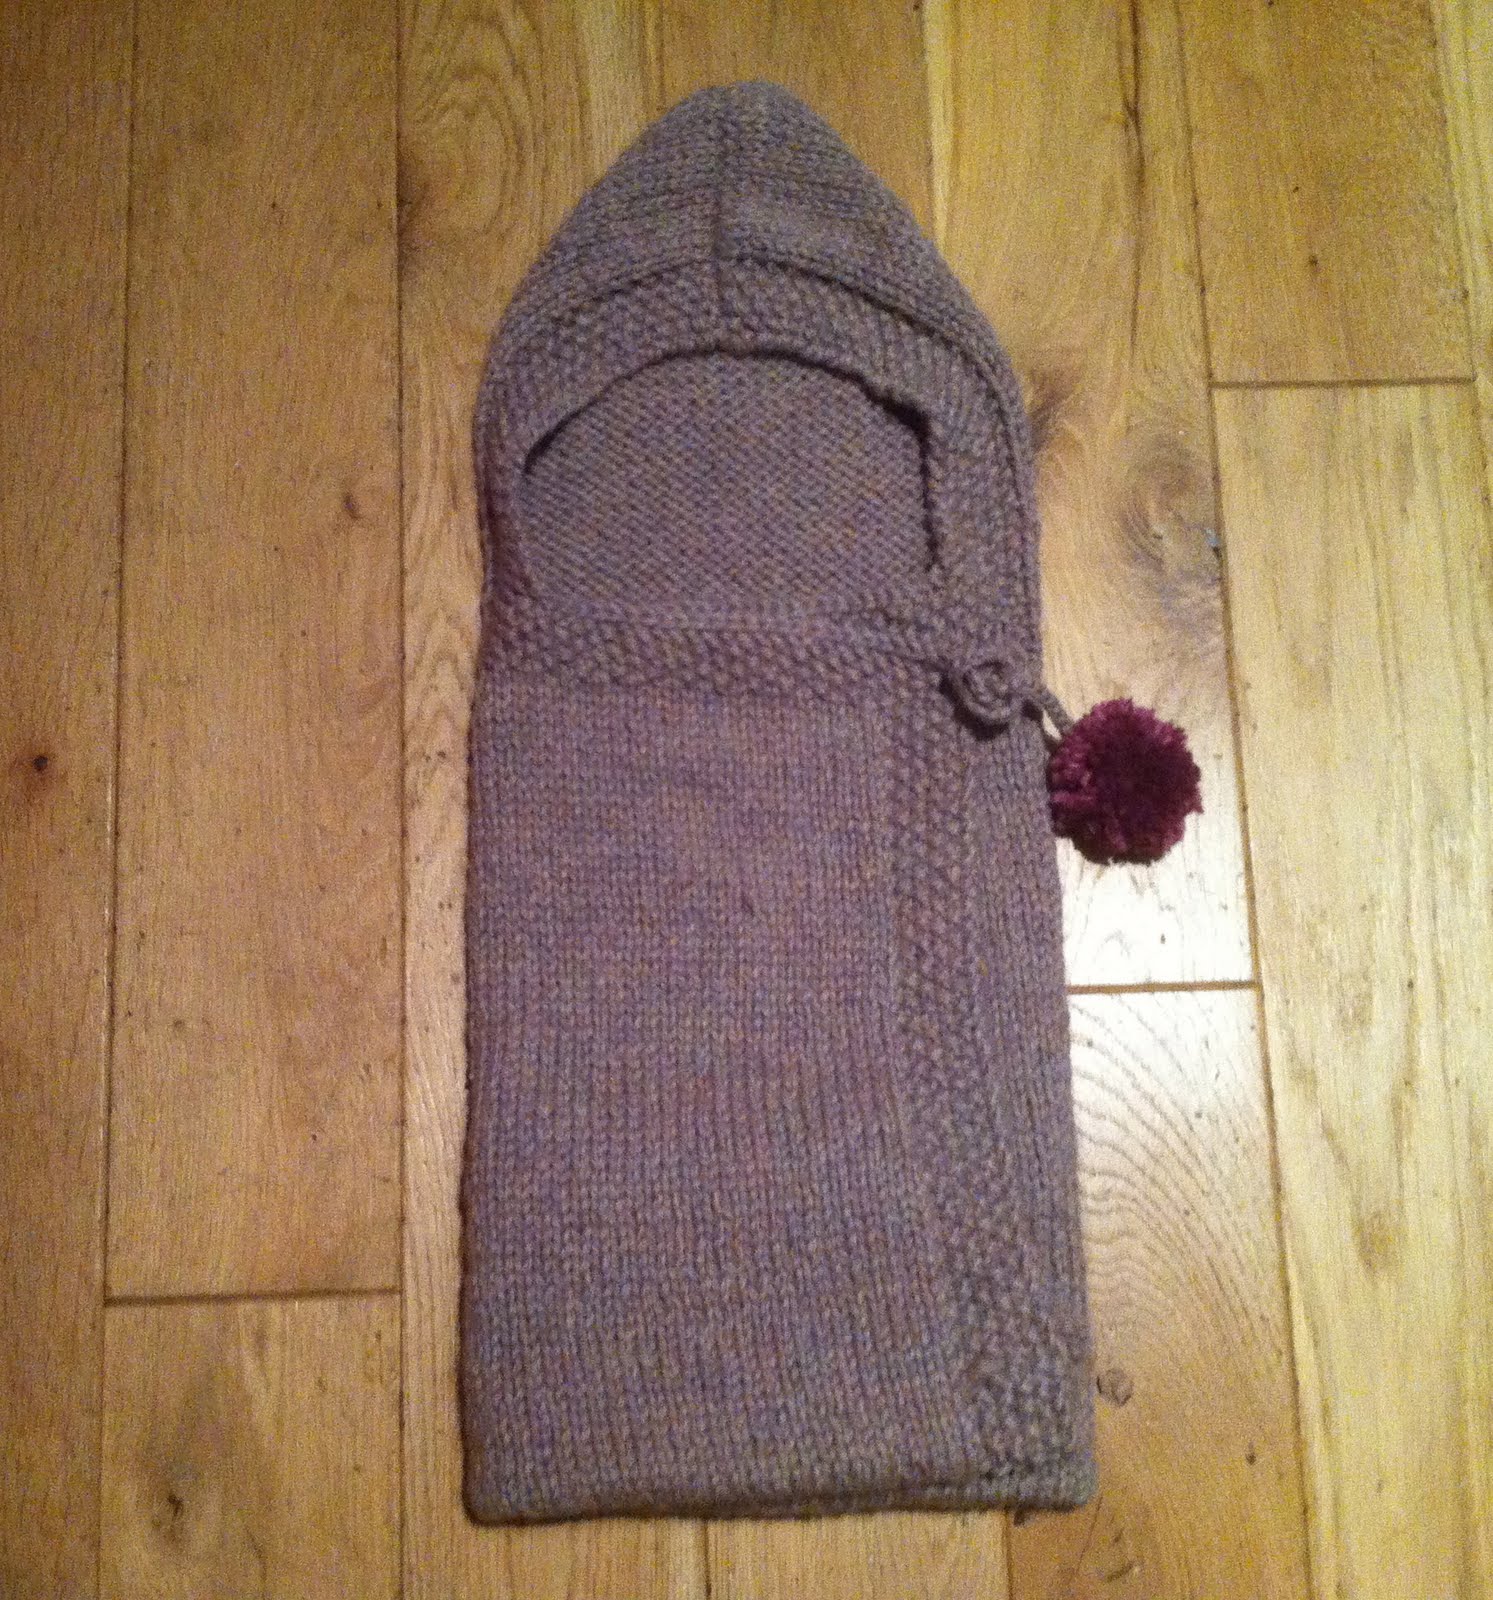
Baby Snuggle Wrap - knitting pattern

Baby things are always such a pleasure to knit.  I find myself taking the rhythmical meditation that comes with rhythmical stitching to new levels... with every stitch I imagine I'm infusing my handknit with love and hope and endearment, to envelop and protect the tiny baby who wears it (so much so, that I can't knit for a baby if I'm in a bad mood).  This Snuggle Wrap was not actually knitted with anybaby in mind (wishful knitting, possiblement?)... just an idea I had and it seemed like the perfect project for the Misti Alpaca yarn that had been calling out to me from my stash basket.  A delicious yarn to knit with, and a deliciously satisfying project, and even dreamier to knit if you have a little one on the way...


Size: newborn - 6 months
Gauge: 3.5 stitches per inch

Abbreviations

k - knit
p - purl
st(s) - stitch(es)
rep - repeat
cont - continue
CO - cast on
BO - bind off
RS - right side
WS - wrong side

Materials

  • 3 x 100g Misti Alpaca Chunky (100% baby Alpaca)
  • 7mm needles
  • 5mm crochet hook
  • yarn needle to sew in tails
  • little scissors
alternative folding technique

Instructions

CO 97 sts.
rows 1 - 6: work in Moss st (k1, *p1, k1 rep from * to end of row).
row 7 (RS): (k1, p1) 3 times, knit to last 6 sts, (p1, k1) to end.
row 8 (WS): (k1, p1) 3 times, purl to last 6 sts, (p1, k1) to end.
rep rows 7 & 8 until piece measures approx 20in/50cm in length.

next row (RS): (k1, p1) 15 times, k37, (p1, k1) 15 times.
next row (WS): k1, (p1, k1) 15 times, p35, (k1, p1) 15 times, k1.
rep these last 2 rows 2 more times (6 rows total of the Moss st shoulders).

next row (RS): BO 26 sts, (k1, p1) twice, k37, (p1, k1) 3 times, BO last 25 sts.
At this point you can either break off yarn and rejoin it, or using a crochet needle slip stitch over to your 46 live stitches.

Hood
cont in the same pattern of the 6 st moss st border at each end of row, stockinette st in between, until hood panel measures approx 8.5in/21cm.
You now want to slip 23 sts onto another needle (preferably a double-pointed needle, otherwise you'll have to slip them all a second time in order to get your needle points matching up when you fold the panel to close the hood seam).
Close hood seam with either a 3 needle bind-off or the kitchener stitch.
Sew in loose tails.


Fastening
Using a crochet hook, join your yarn at a shoulder corner, chain 10, rejoin with a slip stitch at the same point you started to create a loop.  Break off yarn and sew in tails.
Using the photo as a guide, join yarn at a point on the opposite shoulder, chain 40, break off yarn leaving a few inches of yarn to spare.
Make a mini pom-pom with a scrap of a contrasting yarn, or the same yarn, and attach it securely to the long chain (I like a simple reef-knot).  Now you can feed the chain through the loop and fasten it however loosely or tightly you want.


Related Posts Plugin for WordPress, Blogger...