Showing posts with label cowl. Show all posts

Sunday, 28 October 2012

The Hooded Simon - a knitting pattern

Will I be shot by the Sun-lovers if I admit that I'm in trans-seasonal bliss right now? The temperatures are erring towards freezing and the clocks have gone back eliminating another hour of sunlight; there are still heaps of crispy Autumn leaves everywhere fresh for the frolicking, and still a week to go before all the fireworks and mulled wine and toffee apples... It is getting seriously cold though. Perfect timing, then, to make a start on this year's snood, or Simon, as I will from now on be calling them, thanks to Kathryn of Yes I Like That. Made from Toft's chunky alpaca yarn and 10mm circular needles, this guy was knit in an evening and a half and has been warming my scalp ever since. Here's how:


You will need:
Gauge: 10 stitches / 14 rows = 4"


Cast on 60 stitches. Being careful not to twist your stitches, join to work in the round.
Knit 6 rounds of garter stitch (knit one round, purl one round, repeat).
Knit approx 22 rounds of stockinette stitch (just knit rounds), or until your snood is as deep as you want it to be around your neck.
Next round: knit 17, purl 26, knit 17. This sets up the width/depth of the hood. To adjust, increase or decrease the number of knit stitches either side or the purls - and obviously decreasing/increasing the number of purls accordingly to keep the number of stitches in the round consistent. This hood was designed to sit perfectly on the head as in the picture, therefore I would advise against making the hood shallower.
Next round: knit.
Repeat the last 2 rounds twice more.
Next round: knit 20, bind off 20 stitches, knit 20.

Working the hood:

Now, still on the circular needles, but now working in rows knitting the hood back and forth:
Row 1: purl 37, knit 3.
Row 2: knit 37, purl 3.
Continue in this manner, repeating rows 1 & 2 until your hood reaches your desired length (mine is quite long - it's to hold all my hair, of which I have a lot).
End on a knit row - as if you were just about to begin another row of purls.

Closing the hood:

The best way to close the hood (in my opinion) is with the kitchener stitch: holding the needles together (wrong sides of the work facing), cut the yarn leaving a nice long tail (about 4 times the length of what you'll be stitching o be safe). Thread on a yarn needle and following this great video tutorial, close the hood with the kitchener stitch.
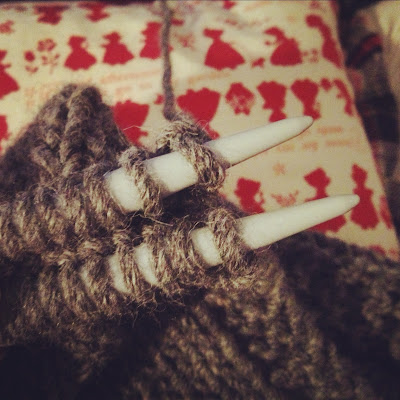

You could, alternatively, cast off at this point and with right sides together stitch the top of the hood closed, or cast off both sides of live stitches with a 3 needle bind off. Man, wouldn't it be fun to make knitting technique video demonstrations? But in a really fun (& still instructional) way...?


With the advantage of hindsight, next time I make this I will avoid the silvery grey colour... Let's face it - I'm reminding you a bit of a knight in a chain maille hood, am I right?? A super cosy knight, mind you.

Sunday, 15 January 2012

The Morning After...
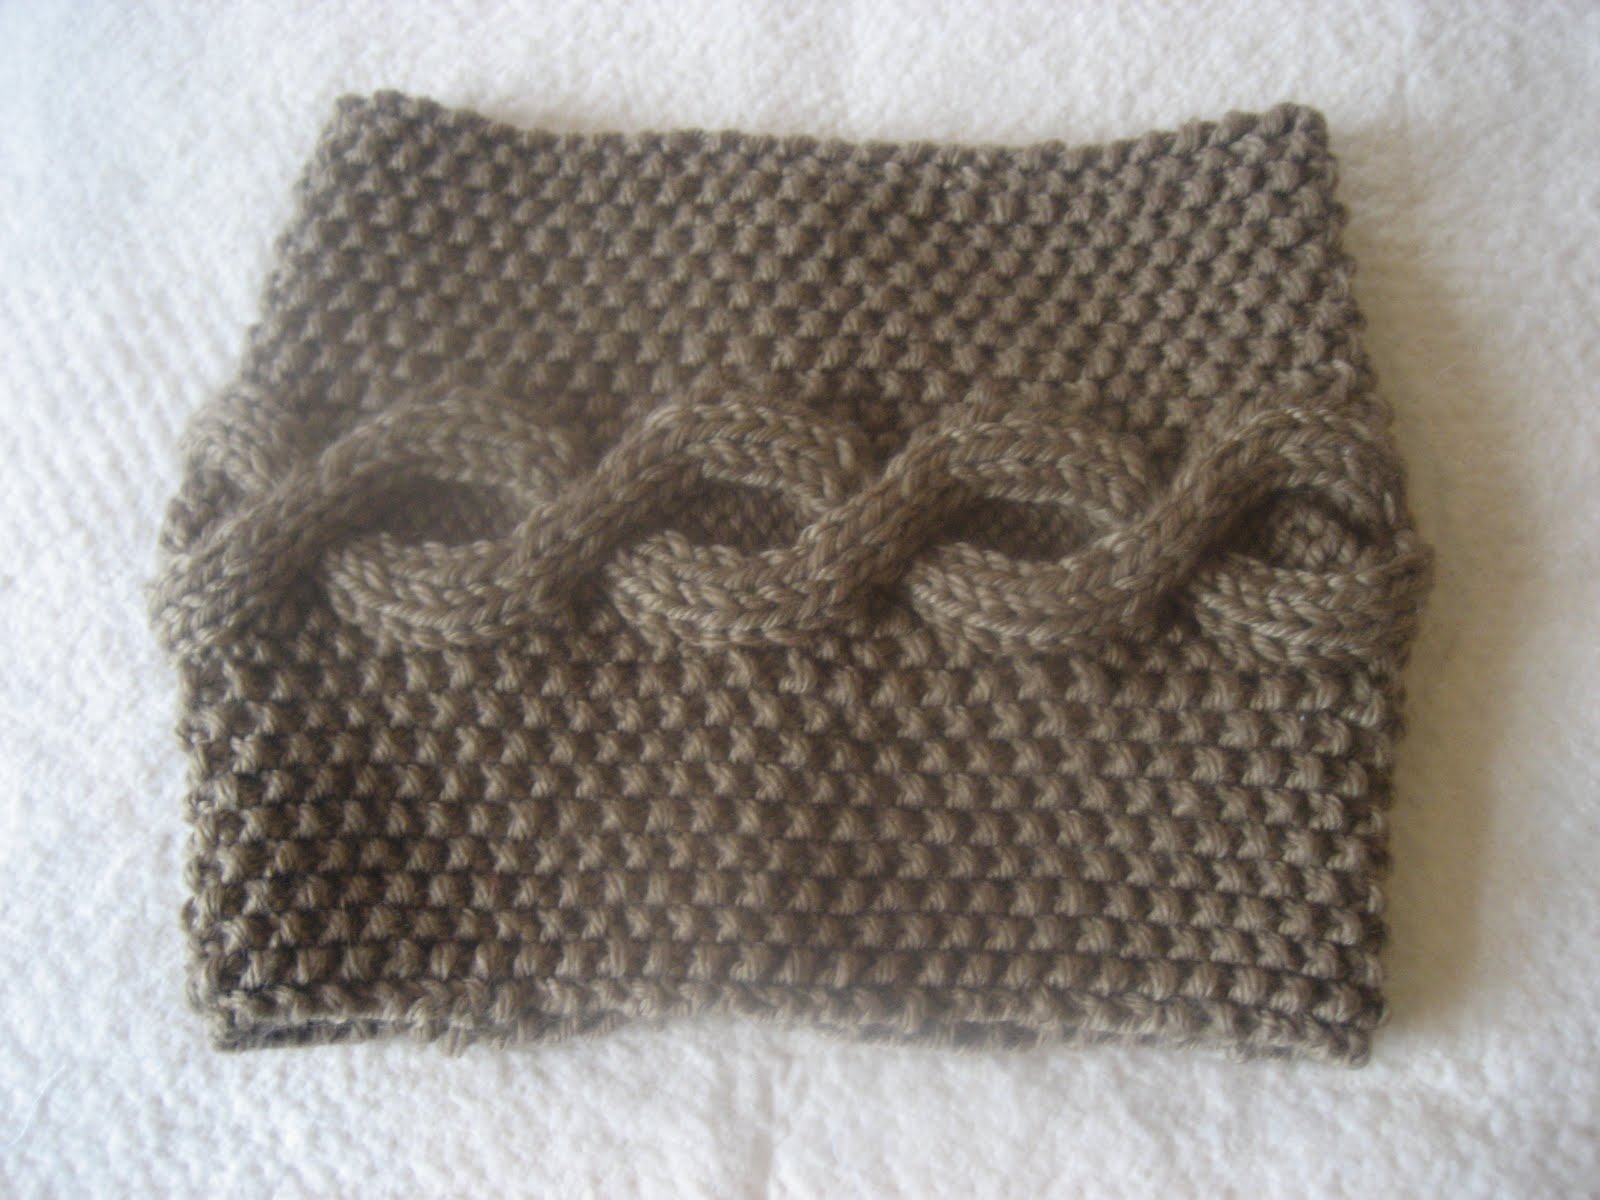
Feeling a touch hungover this morning after having danced the best part of last night away, I couldn't think of a better pick-me-up than a strong cup of sweet, milky coffee and sewing up a quick and simple (quickle?) Springtime Snood on this sunny Sunday morning.


Based on Purlbee's Pompom Cowl, but made with two 1 metre lengths of supersoft viscose sandwiching the pompom braid between the edge seams (as opposed to Purlbee's version that uses one length of fabric and sews the braid directly onto the edges), this lightweight neckwarmer took only half an hour to make, and I can already see that this will be getting a lot of wear.


Now time to soothe my poor, aching (but very happy) feet in a steaming hot bath.   A lovely evening to all.

Tuesday, 8 November 2011

Productivity

It's amazing what can be achieved when presented with an unexpected evening alone.  Not knowing when I might next have a chunk of uninterrupted studio time, I put Christmas present making aside and indulged in some selfish stitching... Skirts and snoods are usually my go-to projects if I want a quick fix - both quick and satisfying to make, not too fiddly, and always a welcome addition to my expanding wardrobe.


I started with a curtain that used to be in my Grandparents' house, but since losing its partner found its way into my stash.  A beautifully heavy floral cotton, too heavy for pleats or ruching, not enough fabric for a full circle skirt, but just enough for a 1/2 circle - something that's been on my to-make list for a while.  Drafting it was quick and easy, I didn't even bother making a paper pattern, which actually I'm slightly regretting now as it came out so perfectly that I'm on the brink of making a whole family of 1/2 circle skirts.  I only had enough fabric for a slightly awkward above-the-knee length, which I embraced by sewing an amazing vintage trim my Mum gave me years ago that's been waiting for the perfect opportunity to be used, to add a few extra inches to the hem.


After the success of my skirt - and I really think this one is up there with my favourite skirts ever made - I settled in for the night and cast on for a chunky ribbed snood, which I had every intention of saving in my Christmas Present Bag...


But hell no, my friends, like so many other things I make intended for others, I am so keeping this one!  I can always knit more...


An evening well spent I say.

Thursday, 27 October 2011

Misty Monday Morning Kit ~ mittens & cowl knitting pattern


~ Making your way to work when it's barely even light ~ Bundling into a frozen car, still in pjs, on the school run ~  Dragging yourself + kids + dogs to the park on a miserably drizzly morning ~

Ok, so it's not yet that cold here yet... But it's definitely getting there.  This winter kit knits up so fast that you won't even have time to feel the cold.  And using only 4 50g balls of Debbie Bliss Como (now discontinued so get it for around £3 a ball on eBay), we're talking unspeakable luxury for little more than £12.  I'll be keeping this set myself, but will definitely be making up a few more as Christmas gifts...


Mittens (make 2)

Size: Adult
Gauge: 10 stitches = 10cm/4"

2 x 50g balls Debbie Bliss Como, main colour (leftovers to be kept for neck-warmer)
1 x 50g ball Debbie Bliss Como, contrast colour
8mm DPNs
10mm DPNs
2 stitch markers
crochet hook (5-7mm)
yarn needle to sew in tails

Abbreviations
DPN - double pointed needle
MC - main colour
CC - contrast colour
CO - cast on
BO - bind off
st(s) - stitch(es)
k - knit
p - purl
rnd(s) - round(s)
rep - repeat
cont - continue
k2tog - knit 2 stitches together
SM - stitch marker
dec - decrease

Cuff & Thumb Gusset

Using 8mm DPNs and your CC, CO 20 sts, arrange over 3 needles (7 sts on 2 of the needles and 6 on the 3rd) and join to work in the round being careful not to twist your sts.
Work 6 rnd of k2 p2 ribbing.
next rnd: switch to MC and work a further 4 rnds of k2 p2 ribbing (10 rnds ribbed cuff).
rnd 11: switch to 10mm DPNs and knit, placing a SM in between the penultimate and last sts.
rnd 12: k1, place SM, knit to 1st SM  ~This is the set up for the thumb gusset.  If this is your first time knitting mittens, this might all sound a little scary.  It's really not - watch this tutorial before continuing to get a visual of the process~ m1 after 1st SM and again before 2nd SM.
next rnd: knit.
You will be increasing sts like this just inside of each SM to create the thumb gusset every other rnd, knitting the alternating rnds.  Cont until gusset has 10 sts.  Slip these 10 sts onto a piece of scrap yarn.

Main Body

CO 2 sts using the thumb technique onto the last needle in the rnd and join mitten, continuing with the 20 sts originally cast on.
Knit 13 rnds (or more depending on length of fingers - but you need to leave a generous inch to decrease), then dec like this:
*k2, k2tog* rep for rest of rnd.
next rnd: knit.
next rnd: *k1, k2tog* rep for rest of rnd.
next rnd: knit.
Cont until you have 10 sts remaining. Close the mitten using the Kitchener Stitch.

Thumb

Pick up 14 sts - the 10 held by the scrap yarn and 4 more to close the gap. Knit one rnd, and on the 2nd rnd, dec 4 sts by k2tog evenly spaced along the inside of the thumb - decreased sts on the outside will be visibly and make the thumb look a little odd.
Knit 4 rnds (or more depending on thumb length).
next rnd: k2tog to end.
next rnd: knit.
Cut yarn and thread onto a yarn needle.  Slip off rem 5 sts onto needle (purlwise) and pull tight. 
Weave in all loose ends.

Make a crochet loop to attach to cuff to hang mittens (optional, but if you do - chain 20).


Neck-Warmer

less than 1 50g ball Debbie Bliss Como, main colour leftover from mittens
just under 2 50g ball Debbi Bliss Como, contrast colour leftover from mittens cuff
8mm DPNs
10mm circular needle (or DPNs)
yarn needle to sew in tails

Using 8mm DPNs and MC, CO 60 sts, arrange over 3 needles (20 on each) and join to work in the round being careful not to twist your sts.
Work 5 rnds of k2 p2 ribbing. 
rnd 6: switch to CC and cont in k2 p2 rib for a further 2 rnds.
rnd 9: switch to 10mm needles and knit in stockinette st until you've almost used up your CC yarn - leaving enough to switch back to your 8mm DPNs for 2 rnds of k2 p2 ribbing.  Switch back to your MC yarn and work 5 rnds k2 p2 rib, and cast off.
Weave in loose ends.  Done!


Keep this kit by your front door and forget numb fingertips and chills down your spine (the cold ones at least!).

Saturday, 15 October 2011

Preparing for Autumn ~ part VI

It's always a strangely bittersweet mix of emotions coming to the end of a project.  As I go ticking off the things on my Preparing for Autumn list I compiled back in July, I find myself feeling satisfied and efficient (and warm!) but also slightly sad to have to put it behind me, having enjoyed the process so much.


But really it's ok - I get to enjoy the fruits of my labour and you can be sure I have an ample supply of to-do lists in the waiting.  And that is why I can't stop crafting: my life is creative and productive, never boring, always learning and improving, a world of infinite possibilities...


My Big Herringbone Cowl, finished just in time as the temperature dropped.  I am completely in love with this stitch - so elegant and subtly interesting, unlike most knits I've seen, without an obvious knit or purl in sight.  To see the journey I've taken in the making of this snood - which began life as an old Maxmara cardi - see here.

Friday, 9 September 2011

SSS'11: Days 4, 5, 6, 7 and 8

Things have been quite uneventful here on the Self-Stitched-Styling front these last few days... Having spent most of my time spring cleaning, at the local recycling/landfill site and picking fruit and veg at a Pick-Your-Own Farm, my silk wiggle skirts and 50s tea dresses have not really been in such high demand.  Instead, determined to stick to my pledge of wearing at least one item of me-made clothing a day, this week I have been mostly wearing Swing Tops and jeans (days 4 & 5). With a few exceptions...

day 6

Day 6: Jersey Circle Skirt. Nothing exciting here, a pretty standard Autumnal outfit, but I was compelled to photograph it simply because this is the first skirt I ever made. And I love it. The seamless viscose jersey drape, I guess what can only be described as a fireworks print, and just the sentimentality of it being my first.

day 7

Day 7: Trudging through a field of sweetcorn in me-made skirt, Bucket Hat and garter stitch snood.

day 8

Day 8: Again, Swing top... But I was cold so I threw on my Pickles cardi.

Luckily for my fancier frocks waiting their turn, I have some exciting plans in store for them this weekend...

Saturday, 3 September 2011

SSS'11: Day 3 (and a new pair of trousers...)

The main thing lacking from my homemade wardrobe is trousers.  In fact, I've never made a pair of trousers for myself.  And the ones I've made for other people have been basic PJ style pants.  When it comes to trousers, I usually just have a favourite pair of jeans that get worn until threadbare and then get replaced with something pretty much identical.  Booooring.  So, having stumbled upon over 4 metres of deep purple corduroy on ebay which I won for little more than £3, I figured now would be the perfect time to have a little experimentation...


I started off very cautiously, terrified of screwing them up and wasting so much great fabric.  This was one of those projects that, as I looked at all the pieces cut and skim read the instructions, really filled me with fear and self-doubt.  I wasn't sure if my sewing skills were up to the challenge.  I even got that slightly deflated feeling as I began to think that maybe I'd been a bit too ambitious.

the original waistband before it got unpicked

But au contraire, my friend!  I am now feeling very smug and suitably grooooovy in my new, purple, corduroy, high-waisted, wide-legged, smokin' hot trousers.  

sept 3rd

And the best part?  The common problem associated with high-waisted pants such as these...?  No camel toe...!

amended waistband


Self-Stitched: Swing Top, High-Waisted Pants 

I'd just like to add that I felt very Self-Stitched this morning too, as I made a start on my Herringbone Cowl, wearing my Sorbetto nightie and a cardi hand knit by my Great-Grandmother...

sept 3rd am

Monday, 29 August 2011

Preparing for Autumn ~ part IV

Coming back to my list of Autumnal projects, I am finally ready to get a shimmy on with my long-awaited Herringbone Cowl from the one and only Purlbee.  I'd made a start on unravelling the unwanted Maxmara cardi back in July, but like a lot of things, it had to be temporarily put on hold as I went on holiday/made various birthday presents/did some sewing for Self-Stitched-September '11 (still haven't made any trousers and only two days to go...).

the original unwanted Maxmara cardi


beginning to unravel before summer

It's been feeling already very Autumnal these days, and I haven't had the pleasure of feeling some delicious yarn slinking through my fingers in an uncharacteristic length of time, so I spent a recent rainy afternoon unravelling the rest - while watching Ice Age 3 for the millionth time - and gently soaking the skeins in my bathroom sink (warm water and Ecover Delicates handwash liquid) to get out the kinks.


washed, dried and ready to be balled up

This has been a really wonderful process.  As with most things, I like there to be several different parts to a project; different skills applied, different rhythms, a diverse and prolonged experience to keep things interesting.  This idea of unravelling an existing garment to re-knit into something new certainly adds a few more stages to the handknitting process, but also feels very cyclical, and lends a greater sense of purpose to the craft (rather like a more accessible version of shearing your sheep-dyeing the fleece-spinning the yarn-knitting warm jumpers for your family).  I think that knitting can definitely be seen as a dated craft; relevant to a Make-do-and-Mend philosophy.  Quite the opposite in fact, knitting is a very expensive hobby.  Unless you go down the squeaky acrylic yarn route, good quality, natural fibres don't come cheap.  Charity shop jumpers, on the other hand, will probably cost less than a measly 100g skein of good yarn.  This method of unravelling thrifted knitwear to re-knit could well be my answer.  Inexpensive, interesting and re-creative.  Just bear in mind these prerequisites when sourcing knitwear to unravel: the bulkier the yarn the better, the bigger the garment the better, and always go for quality.


And now, to cast on.

Monday, 11 July 2011

Preparing for Autumn ~ part I

Amidst all the Summer sewing I've been doing recently, my evenings are starting to be spent preparing for the colder months to come... 

the beginnings of my Go Vest from Pickles

These days I like to get a bit of a head-start on a season.  That way I can really take my time with a project and enjoy the process, especially the big or ambitious ones, spending long evenings taking care over my stitching, and actually getting to enjoy my finished piece for longer.  I learned this the hard way - casting on for a jumper or blanket in the depth of Winter, only to run out of steam halfway through as the days began to warm up.  In fact, I can think of two such jumpers and one such blanket still incomplete hibernating somewhere at the bottom of one stash or another.  So this year I have put my list-making mania to good use and settled on a handful of wintry projects that have been on my mind for a while, which I now seem to have suddenly gathered the perfect materials for.

1.  Go Vest - pattern from Pickles, one of my all-time favourite knitting blogs.  These guys make me want to move to Norway.  For this cardi I'm using the cherry red baby Alpaca yarn I bought from Loop at Jane Brocket's book launch.  

2.  Herringbone Stitch Cowl - pattern from Purlbee, my other all-time favourite crafting blog.  This is something I've wanted to make for ages, but it calls for a lot of yarn...  Then the other day my lovely neighbour friend (Prom Dress Jess) gave me a Maxmara cardi she was throwing out - horrible shape but delicious yarn - so now I'm in the process of unravelling it...

the unwanted Maxmara cardi...


unravelling...

3.  Three pairs of Elfin Slippers - tutorial from Maya*Made.  So far I have picked out the colours for the uppers and linings from some old cut up cashmere jumpers to make a minty-green pair for the little boy, a navy pair for the Papa, and a red pair for me, la Mama.  These have been washed and shrunk to create a denser and sturdier fabric which will be easy to cut and sew, and will be a lot more durable than an un-shrunk cashmere jumper.  Now I need to have a rummage through my leathers to find some soft suede for the soles.


4.  A Swing Jacket - Butterick 5222 vintage pattern.  I've been wanting to make this jacket for years, and being an unprinted pattern, the only thing stopping me before was my lack of sewing confidence.  I am now raring to go with this, and I am also very happy to be slicing up and giving a new lease of life to my very old, very loved, and now very decrepit bordeaux wool cape.  For added yum, I plan to line this with the same nude silk crepe I used for my Silk Sorbetto... oh, YES.

my cape, soon to be swing

5.  As the days start getting colder - two pairs of Snowy Mittens - pattern still to develop.  Using some Debbie Bliss Como I bought last winter, in duck egg blue and stone, I'm planning to make some adult sized mittens with a simple fairisle cuff.  If I'm happy with the pattern, I will of course publish it here!


There.  So I reckon I have plenty to keep busy with, and no doubt some other things will manage to sneak themselves into my lists... They always do.

Saturday, 14 May 2011

Infinity Snood - knitting pattern

First post... and to tell the truth I'm feeling a little frazzled from all the font and layout configuration stuff so we begin with a little something I prepared earlier...


Materials:
  • I used some chunky wool yarn I’d been given from Nepal, so I can’t specify a brand… but any chunky-superchunky weight yarn is ideal.  2 x 100g skein.
  • Size 8mm needles
  • A cable needle
  • Yarn needle for sewing in tails
  • Scissors

Abbreviations:
Cr4L: sl 3 sts onto cable needle at front, p1, k3 from cable needle.
Cr4R: sl 1 st onto cable needle at back, k3, p1 from cable needle.
Cr5L: sl 3 sts onto cable needle at front, p2, k3 from cable needle.
Cr5R: sl 2 sts onto cable needle at back, k3, p2 from cable needle.
C6F: sl 3 sts onto cable needle at front, k3, k3 from cable needle.

Cast on 34 stitches.
Row 1: p1, *k1 p1* 5 times, p1, Cr5R, Cr5L, p2, *k1 p1* 5 times.
Row 2: *p1 k1* 6 times, p3, k4, p3, *k1 p1* 6 times.
Row 3: p1, *k1 p1* 5 times, Cr4R, p4, Cr4L, p1, *k1 p1* 5 times.
Row 4: *p1 k1* 5 times, k1, p3, k6, p3, k1, *k1 p1* 5 times.
Row 5: p1, *k1 p1* 5 times, k3, p6, k3, p1, *k1 p1* 5 times.
Row 6: as Row 4.
Row 7: p1, *k1 p1* 5 times, Cr4L, p4, Cr4R, p1, *k1 p1* 5 times.
Row 8: as Row 2.
Row 9: *p1 k1* 6 times, Cr5L, Cr5R, *k1 p1* 6 times.
Row 10: *p1 k1* 7 times, p6, *k1 p1* 7 times.
Row 11: p1, *k1 p1* 6 times, p1, C6F, p2, *k1 p1* 6 times.
Row 12: as Row 10.
Repeat these 12 rows until the snood can fit loosely around your neck.  I did 9 repeats for this one, I would recommend no less, but a couple more would have made for a nice and slouchy version.  You could also make it long enough to fit doubled around your neck, for that I’d say at least 20 repeats.  It is very important that you finish at the end of a 12-row repeat and not in the middle of a cable so as to achieve a cable that appears infinite.
Cast off with a 3 needle bind-off.  Sew in tails and trim excess.


Related Posts Plugin for WordPress, Blogger...