Thursday, 18 October 2012

My Handmade Style at Stitch and Witter

It's the moment I've been waiting for all week... 


A few months back I was bowled over when Joanne of Stitch & Witter - who's blog makes it to most of our Top 5's I'd wager - asked me to take part in a series of interviews discussing handmade style she was to be hosting on her blog. Bowled over that Joanne even thought of me, and even more over-bowled when I began to see the prestigious company I was in. Ever wondered about SallieOh's split style personality? Tilly's mantra? Zoe's secret obsession with Diner Waitresses? All these incredibly inspiring ladies and other blogging greats are represented in Joanne's 'My Handmade Style'. So you can imagine how smug I'm feeling right now. 

Swing on by to Stitch & Witter if you don't think you know enough about me already...!

Monday, 24 September 2012

Vintage skirt refashion

Let me start by saying that I cannot take any credit for this refashion - the idea was 100% snaffled from this DIY over at A Pair and a Spare.

I spotted this skirt from afar - its pink jungle sunset print specifically - hanging cramped on a rail at a second hand stall in Islington market. I didn't even bother trying it on; at £6 I was gonna have me that skirt and make it fit. Turned out, it may as well have been made to my waistline it fit so well! The length was always a bit too much though, and not wanting to hack up that beautiful fabric without a sure plan, it sat in my wardrobe for over a year without so much as a single outing.


When I saw the aforementioned DIY (on Pinterest, of course) I almost kicked myself for not having thought of it first! So simple! So slap you in the face plain to see! Skirt too long? Cut the bloody bottom off and turn it into a top. Obviously.

And that's just what I did. I sliced off a panel about 5" wide from the bottom of the skirt, twisted it at centre front and handstitched the twist into place. Then I stitched a length of pink elastic to act as a halter.

Even though this, as an outfit will quite clearly remain confined to pool party scenarios, I love it. And the skirt will definitely get taken out a lot more now that it's no longer at that awkward mid-calf length.

And finally a little something for the pubescent boys who just happened to be strolling by at an extremely slow pace during this whole "shoot"...:

Sunday, 23 September 2012

Deeply dippy, part 2


Still obsessed with dramatically dipped hems, this jersey dress - a long sleeved variation of this self-drafted dress, later re-made here - very nearly made it into our first collection of sewing patterns at By Hand London. We had wanted to offer a super easy beginner knits pattern and I tell you, they don't come much easier than this dress! 


I've said this before, but this dress is such a breeze to make. No zips, no buttons, no closures, no shaping, no nothing. Just a simple bodice back and front, sleeves with wristband finish (or just an armhole band for short sleeves), circle skirt basted to bodice then elasticated at the waistline. The only reason this pattern didn't make it into the collection was that it would've used too much tissue paper to print an entire whole-cut circle skirt pattern without breaking it up into multiple segments... and therefore defeating the point of a dress that should be make-able in under an hour.


Like my silk dipped hem skirt, this jersey dress has the same wonderfully swishy, billowy feel that just makes me want to swan about, spinning and skipping every other step. While the silk skirt saw plenty of action over Summer, I think this dress, with its burnt orange and fried egg-like florals, might just be my go-to party dress this Autumn.

Saturday, 22 September 2012

Deeply dippy, part 1

It feels like forever since I posted anything I've made here. And that's not to say I haven't been stitching up the usual storm in my studio. I just haven't had the time to photograph everything. Missed the sun -- bad hair day -- no one to help me take the pictures -- excuses, excuses. So it was on this sunny, but distinctly chilly Saturday morning that I finally got around to photographing the backlog.


I'm not usually a sucker for faddish trends, and fancy my look as more classic with a twist, but I can't deny that I fell pretty hard for all the dipped hems out and about this Summer. So hard that I made two quite serious garments with dramatically dipped hems... 


For this half circle skirt, I used a delicious paisley Liberty print silk, using the more faded, alleged wrong-side of the fabric as my right-side. I preferred the softer pastel effect for the main body of the skirt, and having the bolder print come flashing through from the inside only adds to the interest of this skirt. For a piece such as this where the inside of the garment is as much on display as the outside, it was vital to me to finish everything impeccably.


French seams at centre front and centre back - I obviously would have preferred to have the seams at the sides but it was quite an awkward length of fabric I had left and it was one hell of a lot easier getting the dipped hem symmetrical this way. I actually further reinforced the French seams by pressing and stitching them down, I guess like a flat-felled seam... French-felled seams, then?


I finished the hemline with a simple broderie Anglaise trim which as well as giving it the neatest of finishes, also adds a little extra weight, making this the flowiest, most billow-iest skirt I've ever had the pleasure of wearing. Oh, how it billows...

(apologies for the creasiness of the skirt... I've worn it a fair few times this Summer and I'm afraid I had to dig it out of the laundry basket in order to take these photos. Probably should've given it a little press, but hey. I don't like ironing on a Saturday morning.)


In fact, pictures simply don't do the billow any justice...
gif

Friday, 21 September 2012

I think I just died and went to Fabric Heaven

Could it be that I'm the last sewist in the world to have only just discovered Spoonflower? Never before have I seen such a frenzy-inducing selection of prints... For those of you not yet in the know, Spoonflower is basically a textile designers' Etsy equivalent. They offer a selection of fabrics (cottons/silks/twill etc) and anyone can submit their own designs to be printed onto the fabric of their choice (no minimum order!), either for your own private use or you can create your own shop within Spoonflower where other people can buy fabric printed with your designs, earning you 10% of the sales.

I daren't even begin to count how many hours of my life I've lost over the past week salivating over my computer screen. And I haven't even scratched the surface of all there is on offer, but here is part 1 of my Spoonflower wishlist...

Aztec Bronze peach 

This peachy aztec design is begging to be transformed into a drapey maxi dress... half circle skirt... gently cowled neckline possibly...

orion-awsome-full

It's no secret I'm mega into the galactic - I've even tried creating my own galaxy print - but this is just on another dimension of spectacular.

coral ikat


I'm not a huge fan of matchy-matchy, except when my clothes match my furnishings. To me, sewing doesn't get much more satisfying than that. I would use this coral ikat to make a pretty gathered skirt and some cushion covers to match.

cherryblossom_apricot 

It could be Springtime every day with this peach blossom printed onto sheer cotton voile curtains... Or just a really, really pretty dress. Maybe too pretty. Maybe better for a little girl... Did I mention that the friend who's wedding dress I made back in April got pregnant on her honeymoon?? They're having a girl and I now feel compelled to sew/knit vast quantities of miniature pink things.

cestlaviv_madras orange pink 

This watery handpainted check print reminds me of something my Mum had when I was little. It slightly pains me to say it, but I'm getting a distinct Carrie Season 2 feeling about this... A slinky, silky high waisted quarter circle skirt in this fabric worn with a cropped kiddy t-shirt with some kind of nostalgic Care-bears logo on it. You know it would look hot.

Day of the Dead Skulls Tesselation. 

Can you tell that I'm still only on the "coral" colourway selection?? I'm quite digging dia de los muertos imagery at the moment, something so strangely pretty and morbid at the same time about those decorated skulls.

Sugar Skull Tattoo 

Another dia de los muertos print, and a whole new colourway! Possibly my second favourite colour combination, blue and red reminds me of the Circus, Dumbo and outdoor Summer parties.

military_linen_gray_speckled

I've been wanting to make a more casual, day dress from one of our debut sewing patterns - the Elisalex dress - and I reckon this military stars & chevrons print is just the thing for a mini-bubble skirted, short sleeved variation, complete with vintage military badges sewn on at the shoulders!

DamaskVA2c 

Maybe a little too twee or reminiscent of tacky velvet wallpaper for some, I'm actually quite smitten with this delicate pink damask. The pale colours make for a more subtle effect I think, and I'm not ashamed to admit that I'd like to have a skirt and matching curtains in this fabric...

Art Deco Sun Scales 

I love the bold bright colours and geometric patterns of Art Deco design and this sun deco print is probably my favourite of the lot right now. I won't even start listing what I'd make with this - in short: everything and anything.

Over the last couple of years I've successfully managed to quash my impulse to buy clothes... but it seems that that innate desire to consume has only been relocated to the impulse to shop for fabric, patterns and notions. Ugh. Somebody please grant me access to a hefty Spoonflower voucher! I would use it so well!

Did I mention it's my birthday next month??
Sunday, 16 September 2012

Looking back

As the last few days of an Indian Summer come and go, I'm fondly looking back on the season just gone before I pack my espadrilles away until next year...


Scilly sunset.


Yet another Bucket Hat made from Liesl Gibson's Little Things To Sew, this time in khaki dino print cotton (recognise this fabric from Karen's skirt?) with a vintage lightning sew-on badge.

Sandy and sparkly, sweet little feet.

Mexican daisies.


Decorating the pavement outside our house with chalks.

Cutting the most delicious bronze Chanel-esque tweed, getting ready for an AutumnWinter photoshoot in the middle of August!

An unforgettable evening spent with Leonard Cohen. Front row, no less.

Winding down the Summer at the local fair.


Time to light a fire, methinks. And finally get around to knitting that last sleeve on my jumper from last year.

Friday, 14 September 2012

I'm still here...!

I haven't gone anywhere... In fact, I have a pile of recent makes to be photographed, a To-Post list as long as my arm with recipes, projects and even a knitting pattern or two. Like a messy bedroom with its entire wardrobe strewn about the place, I don't know where to begin! Truth be told, all my blogging efforts have been concentrated on the By Hand Blog these days. With only a month to go before we launch our first collection of sewing patterns, we've been working day and night stitching samples, putting together sewing tutorials and DIY projects for the blog and going over our instruction booklets for the millionth time.

In order to break my blogger's block, I thought I'd look back and share my favourite DIY's and fashion hacks we've been coming up with here at By Hand Studios...


Quite literally a 10 minute project, the Doily Tee project shows you how to add a pretty vintage texture to a plain t-shirt - and use the technique shown for any lace insertion project too.


We had such fun with this! Designing and printing the fluorescent Aztec tiled pattern onto some scrap calico then stitching it up into this tote bag that I use every-damn-day! Never will I have a need for someone-else's-logo canvas tote bag again. Another super quick tutorial.


A black top, an empty spray bottle and some bleach is basically all you need to fake your own Christopher Kane collection; I'm even considering giving the Galaxy treatment to a few metres of black/navy fabric...

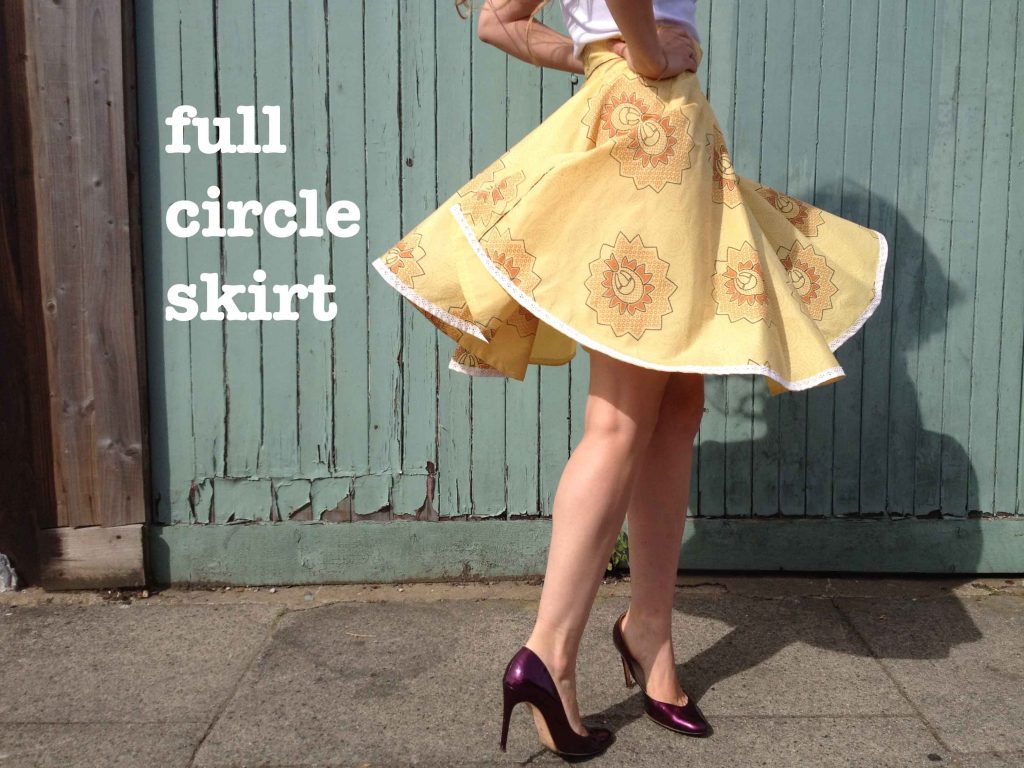
In this tutorial, we break down and explain the equations you need to know in order to make up a full, half and quarter circle skirt. Not being the most mathematically minded person, my brain felt completely and utterly frazzled after writing this post! It always seems so easy as I'm making the skirts, but as soon as it comes to writing it down in comprehensible words... baffling. I think we finally nailed it though!

So there you have it - a little glimpse into what's been keeping me so busy and absent from this space. Not abandoning the SmS ship by any means however, and I promise to be back soon and tackling a serious backlog of Summer makes as well as bunch of projects planned for the colder months to come. No rest for the wicked today though - off to London Fashion Week now to parade myself around in outfits made from our soon-to-come sewing patterns! 

For those of you interested, I'll be posting sneaky peeks on the By Hand Blog
tweeting @byhandlondon and Instagramming @Elisalex // @byhandlondon.

Friday, 24 August 2012

Homemade air-freshener


We've all done it. Come home from a long weekend away only to be greeted by the stench of the garbage you forgot to take out before leaving (at least, I hope we've all done it... Otherwise shame on me!). So you chuck out the stinky bin, wash out the container but the kitchen still smells pretty revolting... I, for one, have always detested the sickly synthetic smell of shop bought air-fresheners, and when it comes to scented candles I'm afraid I have rather expensive taste... So in the interest of saving some pennies and avoiding nasty chemicals, I have chosen to make my own air-freshener using two basic ingredients I'm sure most of you will already have at home.


You will need:

  • bicarbonate of soda (aka baking soda) which absorbs and neutralises bad smells
  • about 20 drops of an essential oil of your choice
  • a shallow jar (clean & dry)
  • a scrap of fabric cut into a circle 2 inches wider than your jar (open weave fabrics work best)
  • a rubber band


Fill your jar about 1/3 of the way with the bicarbonate of soda. Add the oil and mix well (I went for Egyptian Jasmine this time). Have a little sniff - it should smell fairly strongly of the oil you mixed in. Position the fabric over the jar and secure with the rubber band. 

My personal favourite scents when making this powdery potion are Rose and Jasmine, but you could make up infinite blends according to your own tastes, and better yet, if you look into the properties of essential oils, you can mix specific blends to alter the mood of a particular room or even ward off unwanted insects. For example, lavender and chamomile have a calming effect - use in the bedroom of someone having trouble sleeping; rosemary has antibacterial qualities; citronella helps to repel mosquitoes; ylang ylang and patchouli up the, umm, romance... You get my drift!

Sunday, 19 August 2012

On a day like today

With the inconsistency synonymous with the Summer Holidays, and with the whirlwind of work getting done in these parts as I prepare to launch a brand new line of sewing patterns,  I wanted to introduce a new regular feature on this my personal blog, and at the same time re-evaluate what I want this space to represent for me. Keeping most of my fashion related DIY projects for the By Hand Blog, Stitch me Softly will be a place for me to focus on my personal makes, share knitting & crochet patterns, recipes and home DIY's, and the bits in between that most make me happy.

On a day like today will allow me to slow down, reflecting upon and savouring those fleeting 'little things' in my life responsible for reiterating the wonder I feel (almost!) every day. 


Secretly my favourite kind of day: warm and blustery, patchy cloud and intermittent showers... 


Picking the first of the blackberries in the garden - the ones within reach at least - of which only half (if that!) make it past my boy's sneaky fingers and into the kitchen...


...Where they are gently heated them up with a splash of water and a squeeze of agave nectar, and drizzled over a chocolate cupcake... 

Later that evening, whilst watching The Land Before Time, my son looked at me and said, "I love it me and you".


Sunday, 22 July 2012

Experiments with fabric paints - Part II: Celery roses


Did you know that printing with the butt of a bunch of celery produces a pretty perfect looking rose?


I can't take credit for this groundbreaking discovery... Like so many good ideas going around these days, I saw this on Pinterest. I did think it might be interesting though to compile a list of fun things to print with. Any suggestions? Off the top of my head... Snakeskin/chainmail effect printing with netting; geometric patterns by repeating a jar-rim print; okra flower stamps... Leave me your ideas in the comments below and if we get enough good ones I'll try them out and do a roundup post revealing the best results!

I used: Bamber Sew fabric paint in Opaque Red; American Apparel bandeau body; celery butt

Saturday, 21 July 2012

Experiments with fabric paints - Part I: Batman and me


Never mind the current cinematic love affair with superheroes, life with an almost four year old boy means that a good 60% of my brain activity is focused on 'Supes. OK, who am I kidding... Having an almost four year old boy gives me the perfect excuse to be into superheroes, when it was probably me who instigated his obsession in the first place! Superheroes are cool, and that's just the bottom line.

Only a matter of time then before superheroes and sewing started to occupy the same space in my brain...


These days I've been having the most amount of fun playing around with fabric paints since having been sent a bunch by the lovely folks over at Bamber Sew for me to try out. Infinite possibilities, my friends, inspiration overload... Expect a flurry of fabric paint related posts and tutorials here and over at the By Hand Blog over the next couple of weeks.

Being non-toxic and only permanent once ironed, the opaque fabric paints are perfect for young kids to begin experimenting with textiles. When my son saw me stencilling a fluorescent Aztec design onto some scrap fabric the other day, he immediately wanted a go. Instead of just giving him some paint, a paintbrush and some fabric, which would have surely resulted in mess and him getting bored after five minutes, I wanted to give him the tools to be able to create something he'd thought through himself, something he'd be proud of, that he could wear right away. Getting flashbacks of nursery school Arts & Crafts, I got out a potato and asked the boy what image he'd most like to cover his t-shirt in. His response: Batman! But of course.


I must admit, carving the batmotif out of that little potato was a lot more challenging than the standard squares and triangles we used to potato-print at school, but not impossible. With a sharp pencil I outlined the image into the flesh of a potato cut in half, then went over the line with a scalpel (Stanley knife would also do). Still using the scalpel, I carefully sliced away the potato's edge, revealing the batmotif in relief.


We had such fun doing this together and best of all my little boy was able to take complete control of his project. Nothing quite like seeing his sweet little face full of concentration and satisfaction as he made his dream t-shirt a reality! In fact, I'm almost tempted to let him loose on some white cotton and use it to make me a dress with what he comes up with!


Wednesday, 11 July 2012

DIY painted mason jars


If Summer won't come to me, then I'm just going to have to make it happen instead. It had crossed my mind to set up some kind of faux beach scene in the sitting room, complete with fake palm trees, hammock, sand stolen from the local sandpit and the sound of waves emanating from my iPod... Wouldn't that be amazing? But a bit over the top. So instead I just painted the inside of some mason jars, filled them with fake flowers and brought a dash of the sunshine into my house that way. Here's how:

You will need:
  • Some empty jars (clean and dry)
  • Glass paints
  • Paintbrush

Step 1 - Start by deciding the colours for your jars. If you want to mix the colours (I added white to mine to make them lighter) do it directly in the jar. Pour a generous dollop of the paint into the jar and mix it up with a paintbrush.

Step 2 - Swish and swirl the paint around, completely coating the inside of the jar. Drain the jar of excess paint by leaving it upside down (tip: leaving the jar to drain over a ramekin will catch the excess paint ready to be used for something else). Any messy bits can be cleaned up with a damp sponge.

Step 3 - Leave your jars to dry overnight. Preheat the oven to 160 degrees. Bake for 40 mins (be sure to double check this with the instructions on your particular paints as different brands may vary) and leave to cool before filling with flowers, pens, whatever!


Related Posts Plugin for WordPress, Blogger...